How to Tarp a Roof After Storm Damage
When a storm damages your roof, acting quickly can prevent costly repairs and protect your home. Tarping provides a temporary shield against water, wind, and further destruction. Here’s what you need to know:
- Why It’s Important: Roof damage lets water in, leading to mold, structural issues, and even electrical hazards. Insurance may require immediate action to keep your claim valid.
- What You Need: A sturdy tarp, 2×4 boards, screws, a drill, a ladder, and safety gear like gloves, goggles, and a harness.
- Safety First: Never work on a roof during bad weather. Inspect for hazards like weak spots or electrical risks before climbing.
- Steps to Tarping:
- Measure the damaged area and ensure the tarp covers at least 4 feet beyond it.
- Clear debris and secure the tarp with 2×4 boards and screws or ropes for metal roofs.
- Seal edges with tape or roofing cement to prevent leaks.
Step By Step Guide to Tarping a Roof After a Storm saves money but comes with risks like falls or improper installation. Professionals cost more ($750–$4,200) but offer safer, reliable solutions. For severe damage or unsafe conditions, call an expert immediately. Acting fast can save thousands in repair costs.
How To Tarp A Roof | Severe Weather Guide
Storm Damage Impact on Roofs
Storms can wreak havoc on your roof, leaving behind damage that can escalate quickly if not addressed. Knowing the specific types of damage can help you spot potential problems and understand why acting fast is crucial to safeguard your home.
Common Storm Damage Types
Wind damage is one of the most common roofing issues caused by storms. Strong winds can tear off shingles, loosen them, or create cracks that compromise your roof’s ability to protect your home. Missing or damaged shingles expose the underlying materials to the elements, making them vulnerable.
"When shingles are missing or damaged, the material beneath them is at risk of premature deterioration without the benefit of the shingle’s protection." – Mark Soto, Author
Hail damage is another significant concern. Hailstones can dent, bruise, or strip protective granules from asphalt shingles. Across the United States, hailstorms cause around $1 billion in damage every year, with parts of eastern Colorado being particularly prone to these storms.
Heavy rain can weaken shingle adhesion and interfere with proper drainage. Prolonged exposure to moisture speeds up the deterioration of roofing materials and can lead to leaks or even structural issues if water seeps into your home.
Snow and ice can also take a toll. Ice dams form when melting snow refreezes at the roof’s edges, forcing water under the shingles. Additionally, the weight of accumulated snow can strain the roof structure, increasing the risk of damage.
Sun exposure might not seem like a storm-related issue, but over time, UV rays break down the chemical bonds in shingles. This makes them more prone to cracking and tearing during storms.
Each of these damage types underscores the importance of swift action to address roofing issues before they worsen.
Why Quick Action Matters
Waiting to repair roof damage can turn a relatively small issue into a costly disaster. For example, a $500 repair can balloon to $10,000 if left unattended. Delays allow leaks to grow, leading to extensive Emergency Water Damage Checklist: First 24 Hours and even mold.
There’s also the risk of electrical hazards. Water intrusion into electrical wiring can cause short circuits, which are the leading cause of structural fires in the United States, accounting for approximately 24,000 fires annually.
Insurance policies often require homeowners to act quickly to prevent further damage. Failing to meet claim deadlines or neglecting immediate repairs can complicate your claim or even result in denied coverage for damage caused by neglect.
Taking immediate steps, such as Roof Tarping, can significantly reduce these risks. Temporary leak repairs typically cost between $300 and $1,200, while ignoring the issue could lead to water damage and Mold Remediation costs exceeding $10,000. Similarly, replacing a few shingles may cost $500 to $1,500, but waiting until structural damage occurs could push the expense above $15,000.
video inspection after a storm are essential to uncover hidden damage. Often, issues that aren’t immediately visible can worsen over time, so early detection is key to preventing minor problems from becoming major repairs.
Taking prompt action, such as tarping and inspections, can save you from costly repairs and protect your home from further harm.
Tools and Materials Needed
Having the right tools and materials ready before you start is key to ensuring a safe and effective Emergency Roof Tarping. This preparation minimizes the need for repeated trips up and down the ladder, reducing safety risks.
Required Tools and Equipment
You’ll need a few essential tools to get the job done right. Start with a measuring tape to calculate the size of the damaged area. Make sure your tarp will cover the damage with at least four feet of overhang extending from the roof’s peak.
A heavy-duty drill with the correct bits is necessary for securing the tarp in place. You’ll also need 2×4 lumber boards to create anchor points, along with screws and cap nails for fastening. A sharp utility knife will come in handy for cutting the tarp to the right size and trimming any excess material.
A sturdy extension ladder that safely extends above the roofline is essential. Always have a spotter to hold the ladder steady while you work.
Safety is non-negotiable when working at heights. Equip yourself with heavy-duty gloves, safety goggles, protective clothing, sturdy boots with good grip, and a safety harness. Make sure the harness is anchored securely to a stable part of the roof structure.
Additional tools to keep on hand include a hammer, pliers, a chalk line, and a flashlight or headlamp for low-light conditions. Once your tools are ready, select a tarp that matches the demands of your project.
Selecting the Right Tarp
Choosing the right tarp is just as important as having the proper tools. The material, size, and construction quality of the tarp determine how well it will protect your roof.
Material is a key factor. Here are some common options:
| Tarp Material | Characteristics | Suitable Applications |
|---|---|---|
| Polyethylene | Lightweight, waterproof, and affordable | Short-term emergencies |
| Vinyl | Heavy-duty, tear-resistant, and UV-resistant | Harsh weather and long-term use |
| Canvas | Breathable and durable (when treated) | Dry climates and shorter durations |
For temporary fixes, polyethylene tarps are a practical choice – they’re lightweight, waterproof, and cost-effective. If you’re dealing with extreme weather or need long-term protection, vinyl tarps are a better option due to their durability and UV resistance. Canvas tarps, while breathable and sturdy, require waterproof treatment and are better for dry conditions.
Thicker tarps generally offer better durability and tear resistance, though they come at a higher cost. Make sure to measure the damaged area and allow for extra overhang to improve protection and prevent wind from lifting the tarp.
The construction quality of the tarp also matters. Look for tarps with reinforced, rust-resistant grommets for secure tie-downs. These features ensure the tarp stays in place even under stress.
Finally, don’t forget the accessories. Stock up on ropes, bungee cords, or tarp straps to secure the tarp effectively. Choose fastening materials designed to withstand outdoor conditions without degrading.
Keep in mind that many insurance policies require homeowners to take steps to prevent further damage to their property. Tarping a damaged roof not only protects your home but also demonstrates that you’re taking responsible measures to mitigate additional harm. Investing in high-quality materials can save you time and money in the long run.
Safety Precautions
Working on a roof after storm damage is no small task – it’s a job that demands careful attention to safety. The combination of height, unstable surfaces, and bad weather creates serious hazards. Following strict safety protocols is essential before attempting any repairs. These precautions will help prepare you for the steps outlined later.
Roof Tarping Safety Checklist
Weather Conditions
Never climb onto a roof during active storms, high winds, or when the surface is wet, icy, or slippery. Always wait until the storm has completely passed and the roof is dry.
Electrical Hazards
Inspect for electrical dangers before climbing. Look for downed power lines near your property, as they can be deadly. If water has reached your electrical panel or outlets, turn off the main breaker immediately.
Ground-Level Assessment
Start by assessing the roof from the ground. Use binoculars to safely check for structural damage, sagging areas, or debris.
Ladder Safety
Double-check your ladder for stability and secure it properly. Have someone act as a spotter to hold the ladder steady while you climb.
Personal Protective Equipment
Always wear a safety harness with a personal fall arrest system (PFAS) anchored to a secure part of the roof. Additional protective gear includes a hard hat, non-slip boots, heavy-duty gloves, and safety goggles.
Assess Structural Stability
Storm-damaged roofs can have weak spots that might not support your weight. Carefully test each step, especially near damaged areas.
Stay Vigilant
Be alert to potential hazards as you work. If you smell smoke or ozone – signs of gas leaks or electrical problems – leave the area immediately and find a safe location.
When to Call a Professional
Some situations are simply too dangerous for a DIY approach. When safety risks are high, it’s best to bring in professionals. Here are a few scenarios where calling for expert help is the safer choice:
Extensive Damage
If large sections of your roof are damaged, a professional assessment is crucial. Issues like multiple missing shingles, sagging areas, large debris impacts, or significant granule loss across the roof require expert attention.
Steep Roofs
Steep roofs are especially hazardous due to the increased risk of falls. Professionals have the training and equipment to handle these safely.
Signs of Structural Instability
If you notice sagging rooflines, cracked rafters, or soft, spongy areas, these are signs of serious structural problems. In such cases, walking on the roof could lead to a collapse.
Complex Repairs
Major repairs, like replacing support beams or addressing structural damage, require specialized skills and tools. Attempting these on your own could worsen the damage or put your safety at risk.
It’s generally advised that homeowners avoid walking on their roofs due to the risks involved. If you ever feel unsure or uncomfortable during the tarping process, trust your instincts and call for help. Safety should always come first, and many insurance policies will cover professional tarping services to prevent further damage.
For homeowners in need of immediate assistance, Total Care Restoration offers 24/7 Hurricane Ian Tarps Water Damage. Their certified technicians are equipped to handle dangerous situations and secure your roof safely. If conditions feel too risky for DIY efforts, reach out to their emergency line at (786) 610-6317. Protect your home without compromising your safety.
Step-by-Step Tarping Process
Assess and Measure the Damage
Start by inspecting your attic and ceilings for leaks before heading up to the roof. Look for water stains or signs of moisture in the attic and throughout the house.
Once you’re safely on the roof, check for missing, cracked, loose, or dented shingles. Pay attention to granule loss, which shows up as discoloration or dark patches on shingles.
"With strong storms come sharp winds, hail, and heavy rain that can damage shingles, gutters, flashing, and other areas." – Mark Soto
Examine the roof thoroughly, including gutters, downspouts, flashing, and the overall surface. Watch for loose fittings, debris build-up, or sagging areas that might point to structural problems.
Document everything with photos, detailed notes, and measurements. Be sure the tarp will extend at least 4 feet beyond the damaged area on all sides. Once you’ve recorded the damage, clear the area to prepare for tarp installation.
Prepare the Roof Surface
With the damage identified, clear away debris to create a smooth surface. Remove branches, leaves, or other materials blocking the damaged area. Use a blower or broom to sweep away loose debris like broken shingles or branches.
If you find a large hole, cover it with a piece of plywood at least ½-inch thick and secure it with screws. This step helps prevent water from pooling on the tarp, which could lead to sagging or tearing.
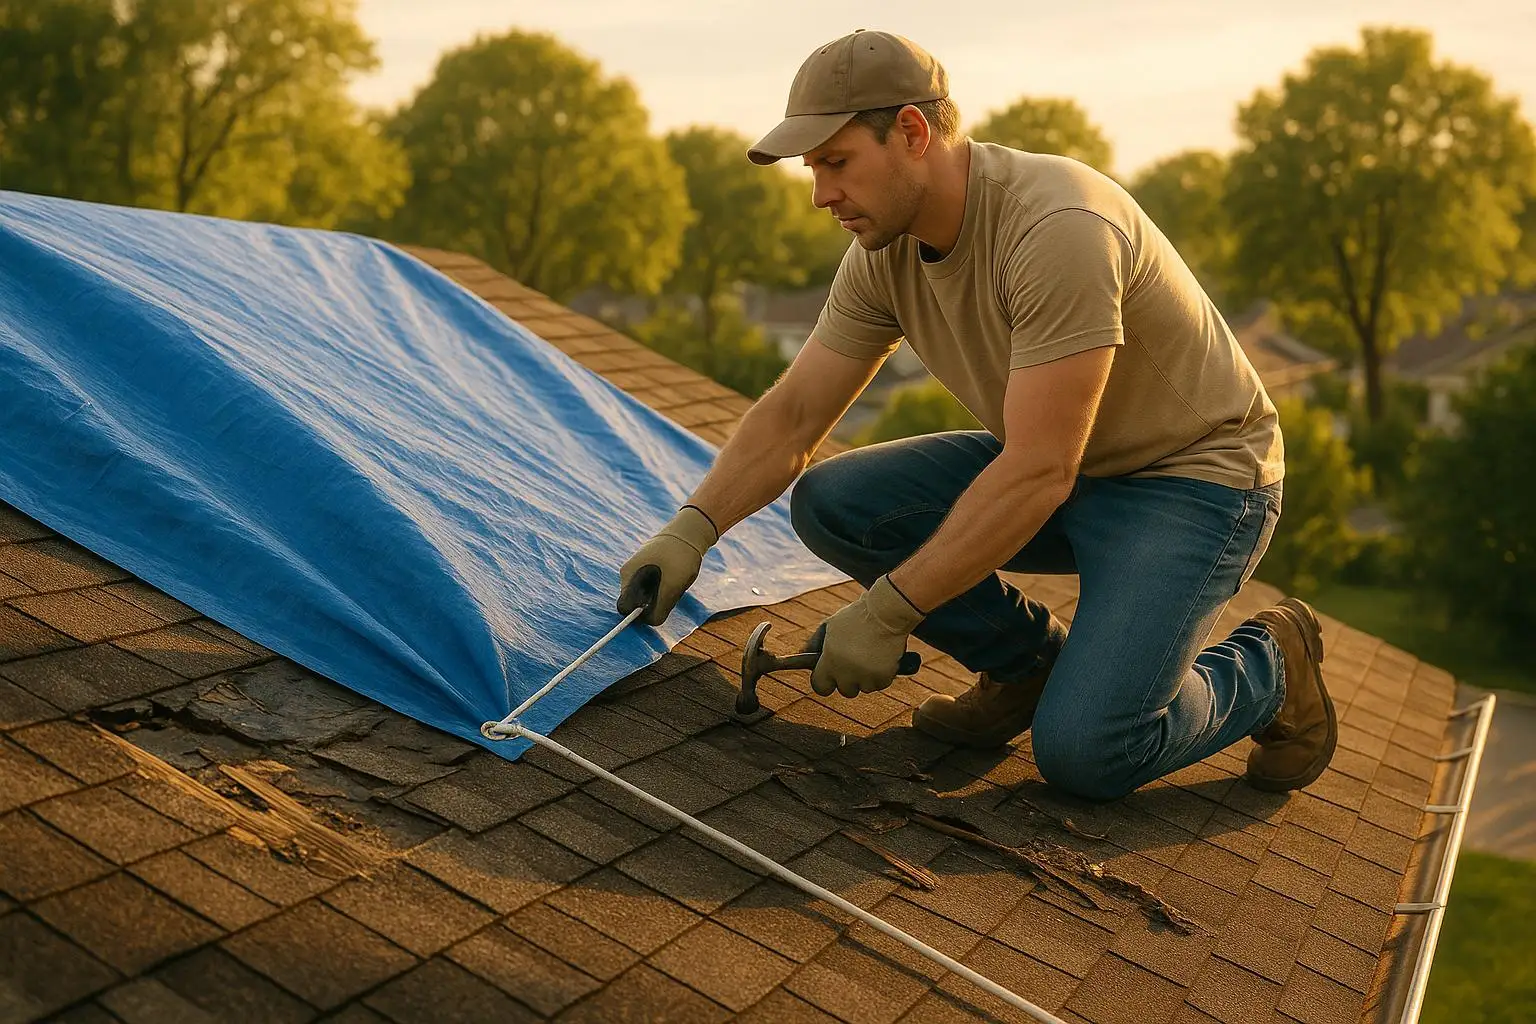
Secure the Tarp
Lay the tarp over the damaged area, making sure it extends at least 4 feet beyond the damage from the roof peak to the eaves. This extra coverage ensures water won’t sneak under the tarp during storms.
To secure the tarp at the roof peak, sandwich it between two 2×4 boards. Use 3-inch deck screws spaced every 12 inches to fasten the boards together through the tarp. Make sure the screws penetrate the tarp, boards, shingles, and roof decking.
For the lower edges, wrap the tarp around 2x4s and secure them to the fascia or soffit with screws. This creates a sturdy, wind-resistant anchor.
If you have a metal roof, avoid drilling holes. Instead, use rope to tie the tarp through its grommets, securing the ends to heavy objects on the ground. For flat roofs, opt for concrete blocks or sandbags placed along the tarp’s edges rather than screws.
Seal the tarp edges with waterproof tape or roofing cement to block water from seeping underneath. To add weight without puncturing the tarp, use sandbags or bricks wrapped in cloth, especially around the corners where wind might lift the tarp. Place them in a grid pattern for even coverage.
Create a slight slope by adjusting the height of your securing points. Keep the uphill edge of the tarp higher to encourage water to run off and prevent pooling.
Keep in mind that emergency tarps are a temporary solution, typically lasting 30 to 90 days. Use this time to work with your insurance company and arrange for permanent repairs. Don’t wait too long to seek professional help for a lasting fix.
DIY vs Professional Tarping
DIY Tarping Pros and Cons
If you’re considering Benefits Shrink Wrapping Roof Blue Tarps, the primary appeal is cost. For smaller repairs, you could spend less than $100, while covering a typical 1,500‑sq‑ft roof might cost between $150 and $350. However, these savings come with some serious risks.
Each year, over 500,000 ladder-related injuries are reported, and falls remain the leading cause of fatalities in the construction industry. As economyrestoration.com warns:
"Climbing onto a storm-damaged roof without proper safety equipment or training puts homeowners at serious risk of falls and injuries." – economyrestoration.com
Mistakes are common in DIY tarping. Missteps like using the wrong securing methods, poor overlapping, or ignoring structural damage can lead to problems such as water pooling, mold, and wood rot. Even the materials you choose matter – deck screws or nails, for example, can create new water entry points, while an improperly secured tarp might tear or blow away in strong winds.
A poorly installed tarp can fail under heavy rain or wind, leading to even more damage and higher repair costs. Kevin Mills of Roof Crafters highlights the risks:
"Most roofing companies don’t recommend DIY fixes. But in an emergency, sometimes you’ve got to take matters into your own hands. Done correctly, DIY tarping can save you money. Done incorrectly? It could lead to more damage (and higher costs) down the line."
On top of the physical and financial risks, DIY repairs may also create liability issues and could void your homeowner’s insurance policy. What starts as a money-saving effort might end up costing much more in the long run.
Because of these challenges, many homeowners opt for professional services to ensure a safer and more reliable solution.
Professional Tarping Benefits
While DIY tarping may seem like an affordable option, professional tarping provides a level of security and expertise that’s hard to match. The higher upfront cost – ranging from $750 to $1,500 for standard services or $1,500 to $4,200 for emergency repairs on a 1,500‑sq‑ft roof – is often worth it for the long-term benefits.
Professionals bring several advantages to the table. They can quickly identify hidden damage, use durable, weather-resistant materials, and ensure proper installation to minimize exposure to the elements. This reduces the chances of additional damage compared to makeshift DIY efforts.
Another perk of hiring professionals is the warranties they typically offer on both labor and materials. Companies like Total Care Restoration go a step further by managing insurance documentation and providing 24/7 emergency services. If you need immediate assistance, you can even reach them directly at (786) 610-6317.
Reputable firms like Total Care Restoration understand how to navigate insurance claims and provide certified technicians who can act quickly to prevent further damage. Their expertise ensures your home is protected until permanent repairs can be completed.
Next Steps
Key Points to Remember
Safety should always come first when dealing with storm-damaged roofs. As Protect Preserve Roofing puts it:
"A well-installed tarp slows the clock, blocks the rain and gives you control over what happens next".
But this temporary fix only works if it’s installed and maintained correctly.
Once your roof is tarped, check it weekly from the ground. Look for sagging areas, water stains, loose or flapping edges during strong winds, or any tears. Take photos to document any changes or damage. Avoid common mistakes like using thin materials, nailing the tarp directly to the roof, or only covering the visible leak.
Plan for permanent repairs as soon as possible to avoid bigger problems like structural damage, mold growth, or worsening indoor air quality. When you’re ready to move from temporary fixes to lasting solutions, professional help is available.
How Total Care Restoration Can Help
When storm damage strikes, Total Care Restoration is here to provide expert assistance. Their team offers 24/7 emergency response, certified technicians, and direct insurance billing to make the process as smooth as possible. Whether you need roof tarping, water damage restoration, mold remediation, or reconstruction, they’ve got you covered.
Professional intervention is key to protecting your home and your insurance claim. Total Care Restoration’s experts can identify hidden damage that DIY inspections might miss, ensuring your tarp stays effective until permanent repairs are completed.
For personalized guidance throughout the restoration process, Total Care Restoration provides dedicated account representatives. If you’re dealing with storm damage, reach out to them at (786) 610-6317 for emergency service.
Act quickly. The longer storm damage is left unaddressed, the more costly and extensive repairs can become. Taking action now could save you thousands in future repair expenses.
FAQs
What are the dangers of tarping a roof yourself, and when should you hire a professional?
Roof Tarping Completely Explained by yourself can be a risky endeavor. If not installed correctly, the tarp might not hold up, leading to leaks or even more structural damage. Worse yet, it could fail completely during the next storm. On top of that, climbing onto a damaged roof is inherently hazardous – especially if the surface is slippery or unstable – putting you at serious risk of injury.
If you’re unsure about assessing or fixing the damage, if the roof is difficult to access, or if safety concerns are weighing on you, it’s best to call in a professional. Experts, like the team at Total Care Restoration, have the experience and proper tools to secure your roof safely and effectively, giving you confidence that the job is done right.
What steps should I take to protect my insurance claim after storm damage to my roof?
When dealing with storm damage and filing an insurance claim, it’s crucial to take the right steps to protect your case. Start by documenting everything thoroughly. Snap clear photos and videos of the damage from various angles, and save receipts for any emergency repairs you handle right away.
Next, contact your insurance company as soon as possible to report the damage. Be sure to follow their specific instructions for filing your claim. Avoid making statements that might suggest you’re admitting fault or guessing the cause of the damage – it’s better to stick to the facts.
Consider arranging for a professional inspection to ensure all damage is identified and properly documented. Keep every piece of communication and paperwork organized, and follow the procedures outlined in your policy closely to avoid unnecessary complications.
What is the best type of tarp for protecting a roof after storm damage?
For lasting protection against harsh weather conditions, vinyl tarps crafted from PVC-coated polyester are a top choice. These tarps are tough, completely waterproof, and built to resist UV rays, making them perfect for safeguarding your roof from additional harm.
When choosing a tarp, look for one that’s thick (a minimum of 10-12 mils) and large enough to fully cover the damaged area. Installing it properly is crucial to ensure it works effectively and lasts as long as possible.
Related Blog Posts
Want to Learn More?
Read our comprehensive guide covering everything you need to know about this topic.
The Complete Guide to Storm Damage Restoration and Roof Protection in FloridaNeed Professional Help?
Our expert team is ready to assist with your storm damage restoration needs.
View Storm Damage Restoration Services