Flood Drying Checklist for Homeowners
When floodwater enters your home, acting quickly can save you thousands in repairs and prevent health risks. Mold starts growing within 24–48 hours, and structural damage worsens with time. This guide helps you navigate the drying process safely and efficiently.
Key Steps:
- Safety First: Inspect for hazards like gas leaks, electrical risks, and structural damage. Wear protective gear (e.g., N95 mask, gloves, waterproof boots).
- Document Damage: Take photos/videos before cleanup for insurance claims.
- Remove Water: Stop the source, use wet/dry vacuums, and avoid removing more than 1 foot of water per day in basements to prevent structural issues.
- Dry Thoroughly: Use fans, dehumidifiers, and remove wet items like carpets and insulation. Monitor hidden spaces for moisture.
- Clean and Disinfect: Use soap, water, and EPA-approved disinfectants to remove contaminants. Never mix bleach with other cleaners.
- Prevent Mold: Control moisture, check for signs like musty odors, and call specialists for widespread mold.
When to Call Professionals:
- Extensive water damage or structural risks
- Mold covering large areas or recurring problems
- Contaminated HVAC systems
Swift action and a clear plan are crucial for minimizing damage and ensuring a safe, healthy home. For severe cases, Commercial can provide expertise and equipment to handle the situation effectively.
Flood Clean-up – 5 Steps Including Mold Control
Safety Checks and Damage Assessment
Before you start moving furniture or grabbing tools, pause and prioritize your safety. Entering a property after water damage unprepared can expose you to serious dangers. According to the CDC, flooded areas may harbor mold or sewage, both of which can pose health risks. Follow these essential steps to stay safe and assess the damage effectively.
Check for Safe Entry
Do not enter a flooded property until you’re sure it’s safe. Begin by inspecting the exterior for visible structural damage – look for cracked wood, sagging rooflines, leaning walls, or foundation shifts. If you notice damaged doors, windows, or masonry, stop immediately and call a professional for help.
Be alert to other warning signs, like flickering lights, burning odors from outlets, buzzing sounds near walls, or discolored outlet covers.
"NEVER turn power on or off yourself or use an electric tool or appliance while standing in water." – CDC
Gas leaks are another critical hazard. If you detect the distinct "rotten egg" smell or see bubbling water near your property, turn off the main gas valve, open all windows, and leave the area immediately. Then contact your gas provider, local police, or fire department. Avoid any actions that could ignite a spark.
Only return during daylight hours and air out the home for at least 30 minutes if it has been sealed for several days.
Wear Protective Equipment
Floodwaters often carry harmful substances like mold and sewage. Before entering, gear up with the right protective equipment. This includes waterproof boots, long pants, durable work gloves, protective eyewear, and an N95 respirator mask.
Use battery-operated flashlights or lanterns instead of candles, gas lanterns, or torches to minimize fire risks and avoid accidental sparks in a potentially volatile environment.
Once you’re properly equipped and the area is secure, begin documenting the damage.
Document All Damage
Take photos and videos as soon as it’s safe to enter. This step is vital for your insurance claim – thorough documentation can be the difference between receiving fair compensation and facing a financial burden.
"Documenting your claim by taking pictures and videos, taking notes, and keeping copies of all receipts, reports, correspondence and other documents creates a concrete and verifiable record and point of reference for your claim." – Pearson Legal, P.C.
Capture both wide-angle and close-up images of the affected areas. Include serial numbers from damaged electronics or appliances, and keep small samples of ruined materials. It’s important not to clean up or throw anything away until you’ve fully documented the damage – you can’t recreate this evidence later.
Write detailed descriptions of each damaged item, noting the specific issues and estimating replacement costs. This level of detail not only strengthens your claim but also helps protect you from potential fraud accusations.
Water Removal
Once you’ve documented the damage and ensured the area is safe, it’s time to tackle water removal. Time is critical – every hour of delay increases the risk of further damage. Follow a systematic approach: first, stop the water source, then focus on removing the water that has already accumulated.
Stop the Water Source
Before you start extracting water, identify and halt the source of the flooding. Disconnect power and gas supplies at your breaker panel or fuse box to avoid potential hazards. If floodwaters are nearing your electrical panel, do not attempt to handle it yourself – contact your power company immediately to cut off the supply.
For homes with private wells, shut off the well pump to protect it from floodwater contamination. Take immediate steps to divert water away from your home by clearing snow from the foundation and ensuring downspouts direct water away from the structure. Repair any broken pipes or seal leaks that are contributing to the flooding. If you’re dealing with a sewer backup, plug basement floor drains, unbolt and seal toilet outlet pipes, and disconnect and cap washing machine and sink drains in the basement.
If you come across propane tanks during your inspection, contact your local fire department, police, or State Fire Marshal’s office without delay. Once the water source is under control, you can move on to removing the standing water.
Extract Standing Water
With the inflow stopped, focus on removing the water as quickly and efficiently as possible. The method you use will depend on the amount of water and the surfaces affected.
"When water damage strikes, immediate action is critical to prevent further destruction."
- PuroClean of San Fernando
For basements with heavy flooding, avoid removing more than 1 foot of water per day. Rapid removal can create pressure imbalances between the water-saturated soil outside and the dry interior, potentially causing structural damage to your foundation walls.
A wet/dry vacuum is your go-to tool for most water extraction tasks. After removing standing water, use industrial fans, dehumidifiers, and steam cleaners (for carpets) to dry and sanitize the affected areas.
If your carpet padding is soaked, pull back the carpet, vacuum the padding, and use fans to dry it thoroughly. Severely waterlogged padding may need to be replaced. Pay attention to hidden pockets of water under furniture or in corners, as these can lead to future problems if left untreated. If mud or debris is present, use shovels and buckets to clear the area before vacuuming to prevent clogging your equipment.
Set up multiple fans to improve airflow and ventilation, and run dehumidifiers to pull excess moisture from the air. This combination will help speed up the drying process and prevent further damage.
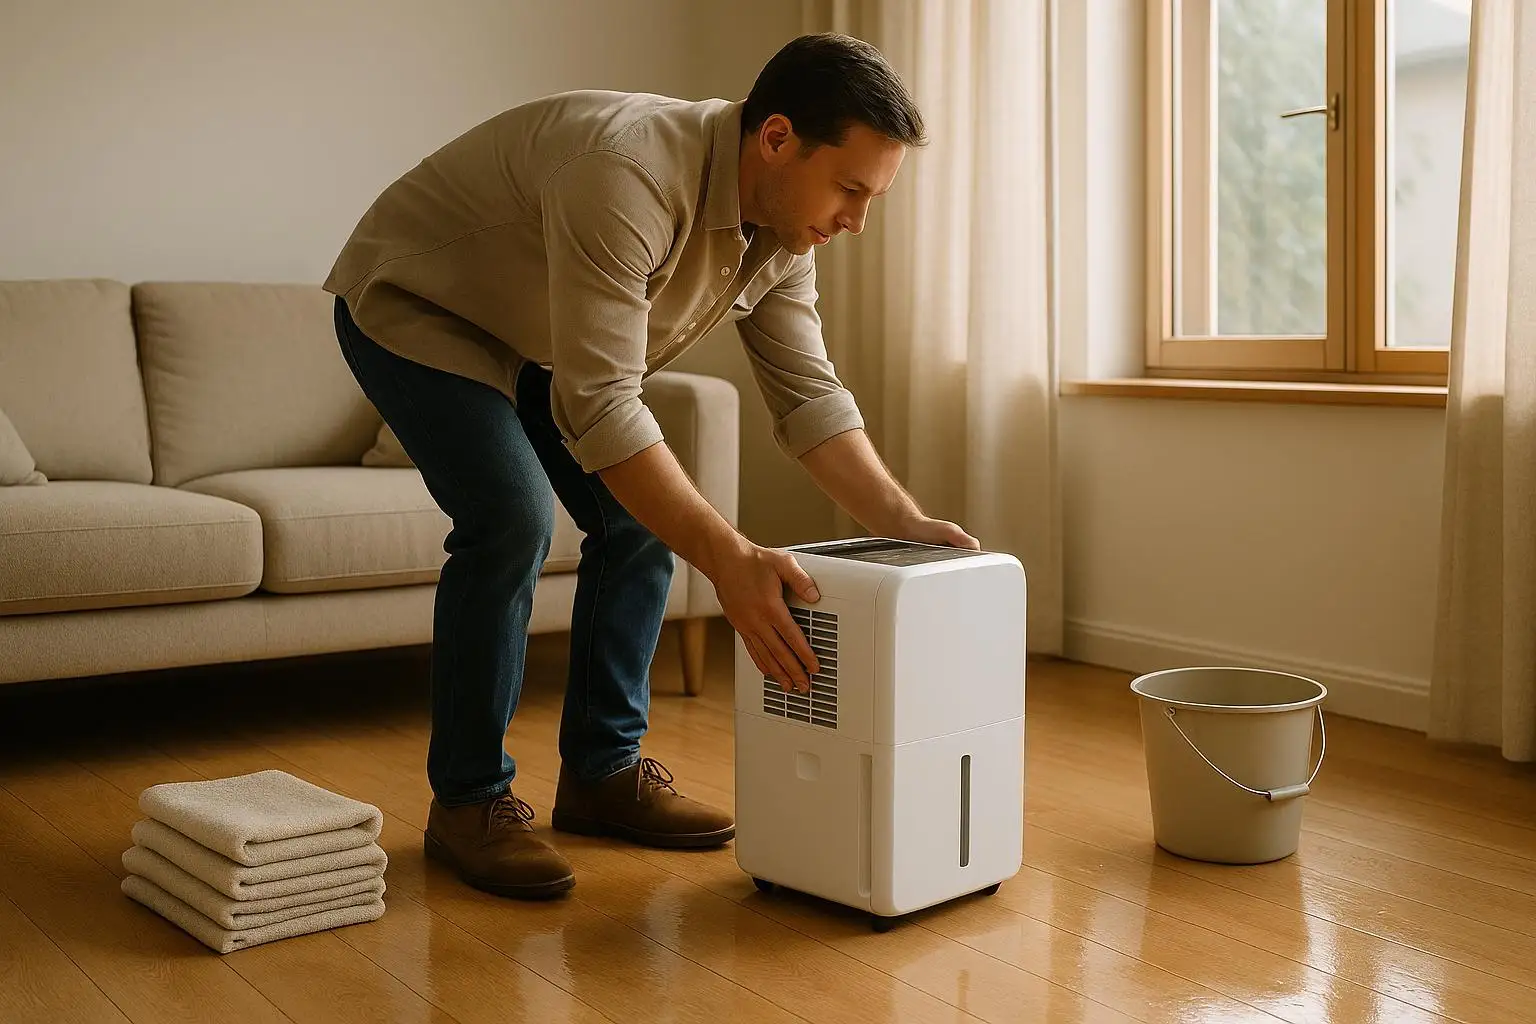
Drying Process
After removing standing water, the next step is to thoroughly dry all affected areas to prevent mold from taking hold. Mold can start growing within just 24 to 48 hours of water exposure, so time is of the essence. Make sure to address every surface and hidden corner in your home to eliminate moisture completely.
Remove Wet Items
Start by removing all water-soaked materials like carpets, curtains, and upholstered furniture. Items that can be cleaned and dried safely should be salvaged, while those that can’t be properly disinfected should be discarded.
Pay special attention to items like pressed wood furniture, mattresses, and stuffed toys that have been exposed to floodwater. These are often difficult to salvage. Clear out mud and silt before they dry – using a hose can make this easier. For items that are salvageable, set up a drying area in an unaffected part of your home or outside. Clean these items with an appropriate furniture cleaner and a clean cloth before moving them to the drying zone. Curtains may be saved by washing them, and if the fabric allows, using bleach.
Remove wet drywall and insulation to ensure the area dries out completely. Use a utility knife and pry bar to cut and remove these materials along a line about one foot above the waterline or at the drywall seams. Wet insulation should be removed immediately, as it loses its effectiveness and can become a breeding ground for mold.
Once you’ve cleared out all the wet items, you’re ready to set up drying equipment.
Set Up Fans and Dehumidifiers
Position drying equipment strategically to maximize airflow. The number of fans and dehumidifiers you’ll need depends on the size of the affected area. Arrange fans to create cross-ventilation and use dehumidifiers to keep indoor humidity levels below 60%.
Place fans in room corners or high points to improve air circulation, and position them near the dampest areas for quicker drying. In larger rooms, placing fans on opposite walls can help create better airflow. For reference, airflow speeds of about 600 feet per minute – roughly 8 miles per hour – are generally effective.
"Improving the airflow and air circulation promotes the movement of moisture and helps eliminate mold growth in porous materials." – Michael Herbst, AdvantaClean’s IICRC In-House Instructor
For example, drying a 12′ × 15′ room with an 8′ ceiling typically requires around five fans and a dehumidifier that can remove 30 pints of water per day. In a 300-square-foot basement with multiple damp areas, you might place one fan near a damp wall in the northeast corner, another in the southwest corner for cross-ventilation, a dehumidifier in the center, and additional small fans near specific trouble spots, like sinks or toilets.
If the outdoor air is less humid (usually during the day), open windows and doors to improve ventilation. Close them at night to prevent moisture from coming back in. Use a hygrometer to monitor humidity levels and adjust your equipment as needed. Note: If mold is already present, avoid using fans, as they could spread mold spores.
After setting up the equipment, check to ensure it’s effectively circulating air and reducing moisture levels.
Inspect Hidden Areas
Don’t forget to examine hidden spaces like behind walls, under floors, in attics, and crawl spaces. Use a flashlight and a What Is a Moisture Meter the Best Measurement to look for signs of dampness, such as discoloration, musty smells, warped materials, or water stains.
"Mold may be hidden in places such as the backside of drywall, wallpaper, or paneling, the top side of ceiling tiles, the underside of carpets and pads, etc." – Environmental Protection Agency (EPA)
Focus on areas that are prone to retaining moisture, such as basements, crawl spaces, spots around plumbing fixtures, and beneath appliances. Check your home’s exterior too – inspect the foundation and siding for pooling water or water intrusion. Make sure gutters and downspouts are clear to prevent water from collecting near the house.
In one case from 2022, a homeowner discovered water damage in a living room ceiling caused by a leak from a recently renovated bathroom. Using an inspector’s infrared camera and confirming with a moisture meter, the problem was identified and addressed. After monitoring the area, no further issues were reported over the next two years.
Moisture meters are invaluable during this process, as they can detect dampness that isn’t visible to the naked eye. This allows you to pinpoint areas that may require additional drying or even professional help.
Cleaning and Disinfection
Once your home is dry, it’s time to clean and disinfect all surfaces to remove harmful contaminants left behind by floodwater. Floodwater often carries sewage, chemicals, and other toxins, making this step essential for health and safety.
"Floodwater may carry silt, raw sewage, oil or chemical wastes that can cause a whole range of bacterial, viral and/or parasitic diseases. That’s why proper clean-up methods are critical, requiring disinfecting, not just cleaning."
- American Cleaning Institute (ACI)
Clean and Disinfect All Surfaces
Start by wiping surfaces with a damp cloth and detergent. Avoid scrubbing or stirring up dust initially, as this can release harmful particles into the air. Remove loose dirt and debris before moving on to disinfection.
"First, you should use clean water and detergent to physically remove contaminants from surfaces…You can also use an EPA-registered disinfectant or sanitizer on some clean surfaces that do not absorb water to kill microorganisms such as viruses, bacteria, and mold."
- US EPA
For hard surfaces like floors, walls, countertops, and appliances, clean thoroughly with soap and water before applying a disinfectant. Disinfectants are only effective on clean surfaces, so don’t skip this initial step.
Use a bleach solution for non-porous surfaces. Mix up to one cup of bleach per gallon of water (or one cup per five gallons for larger areas).
"Bleach should be used to clean floors, stoves, sinks, certain dishes and countertops. Do not use more than one cup of bleach per gallon of water. Remember to never mix bleach with ammonia or other cleaners."
- The American Cleaning Institute (ACI)
Safety Tip: Never mix bleach with ammonia or other cleaning products, as this can produce toxic fumes. Always follow the product’s instructions for proper dilution and contact time.
For wood frames and structural elements, options like chlorine bleach, phenol-based products, or pine oil disinfectants can be used. Keep doors and windows open during cleaning to improve ventilation and speed up drying.
To streamline the process, try a two-bucket method: one bucket for your cleaning solution and another for rinse water. Change the rinse water frequently to avoid recontaminating surfaces.
Once disinfection is complete, use a HEPA-filtered vacuum to remove any lingering contaminants.
Vacuum with HEPA Filter
After surfaces are clean and dry, use a HEPA-filtered vacuum to remove dust and debris that may still contain harmful particles. HEPA filters are designed to trap microscopic contaminants, including mold spores, that regular vacuums might miss.
Make sure surfaces are completely dry before vacuuming, as using a vacuum on wet areas can spread contamination and damage the equipment.
Focus on corners, baseboards, and other areas where debris may have settled. Pay extra attention to spaces that were submerged, as they often harbor hidden residue.
Once vacuuming is done, assess your belongings and discard items that cannot be salvaged.
Dispose of Damaged Items
Some flood-damaged items cannot be saved, no matter how thorough the cleaning. Porous materials that have absorbed floodwater should be discarded, as they cannot be fully cleaned or disinfected.
Items to discard include:
- Mattresses, carpeting, and stuffed toys
- Pressboard, plywood, or particleboard furniture
- Upholstered furniture not dried within 48 hours
- Cloth items that cannot be washed in hot water
- Wallboard that remains damp or shows mold after 48 hours
- Any food exposed to floodwater
Food safety is especially important. Discard all fresh or pantry foods that came into contact with floodwater, including unopened cans and glass containers. Items in cardboard boxes, flexible packaging, or with cork-lined tops, pop-tops, or paraffin seals should also be thrown out.
Check with local authorities for guidance on disposing of contaminated materials, as some items may require special handling.
Timing matters – the CDC advises completing cleanup and drying within 24 to 48 hours to prevent mold growth. Acting quickly and thoroughly is your best defense against long-term damage and health risks.
Mold Prevention and Detection
Once you’ve cleaned and disinfected after a flood, the next step is tackling 5 Steps for Emergency Mold Mitigation. Mold can start forming within just 24–48 hours of flooding, so it’s critical to remove all remaining moisture and keep a close eye on affected areas.
The secret to stopping mold lies in controlling moisture. Even if you’ve removed standing water and dried visible surfaces, hidden dampness can linger in wall cavities, under floors, or inside building materials – perfect conditions for mold to thrive. Stay vigilant by checking for visible signs of mold and unusual odors to catch it early.
Look for Visible Mold
Start by visually inspecting all areas impacted by flooding. Mold often appears as black, green, or brown spots on walls, ceilings, and other surfaces. Use a flashlight to carefully check dark corners, behind furniture, window sills, door frames, and areas near plumbing.
Pay special attention to spaces that were submerged or have remained damp. Signs like peeling or bubbling paint can signal moisture issues and potential mold hiding beneath the surface.
Common mold hotspots after flooding include basements, crawl spaces, HVAC vents, behind appliances, bathrooms, and kitchens. Don’t forget to examine ceiling tiles, insulation, and any leftover carpets or upholstered furniture. If you notice discoloration or mold growth, take photos for documentation before starting any remediation.
Check for Musty Smells
Mold often reveals itself through a musty or earthy odor. Walk through each room and note if the smell is stronger in specific areas, especially near HVAC vents or in enclosed spaces. If the odor intensifies when your heating or cooling system is running, it could mean mold contamination inside the system.
Additionally, keep an eye on your household’s health. Symptoms like sneezing, coughing, or respiratory irritation that worsen in certain areas of your home might be linked to mold growth and poor indoor air quality. Studies show indoor air quality can often be higher than outdoor levels. If these symptoms persist, it may be time to call in the professionals.
Contact Mold Specialists
If you spot visible mold, notice persistent odors, or if the mold covers an area larger than 3’×3′, it’s time to call a certified mold remediation specialist. This is especially urgent if anyone in your home experiences respiratory issues. Avoid using your HVAC system until professionals have inspected it thoroughly. For immediate concerns, you can reach out to Total Care Restoration at (786) 610-6317.
The National Institute for Occupational Safety and Health reports that nearly 47% of U.S. homes show signs of visible mold or mold odors.
"An existing mold issue will eventually be discovered. Either during escrow or, even worse, after close of escrow. It’s better to get out ahead of it. The issues won’t fix themselves and tend to get worse with time." – Bret Pfeifer, lead inspector at Golden State Mold Inspections
For extensive Emergency Water Damage Checklist: First 24 Hours, Total Care Restoration offers 24/7 Mold Remediation. Their certified technicians can assess the situation, create a remediation plan, and even work directly with your insurance company to simplify the process.
When to Call Professionals
After taking initial steps to dry and clean up after water damage, it’s crucial to recognize when professional help is necessary. Certain situations, especially those involving severe flooding or structural risks, require certified expertise. Water damage is a leading cause of homeowner insurance claims, accounting for nearly 30% of cases.
"Water damage is like an unwelcome guest that arrives unnoticed and wreaks havoc behind closed doors." – Lisa McIntyre, Water Mitigation Specialist
Large-Scale Water Damage
When water damage affects the structural integrity of your home, professional assessment is a must. Signs like sagging ceilings or spongy floors often indicate serious infiltration that could compromise your home’s safety. Multi-room flooding or prolonged exposure to water is best left to experts.
Hidden water damage, such as leaks behind walls or the sound of running water with no visible source, also requires professional attention. These situations often demand specialized equipment that goes beyond what most homeowners can access. Additionally, if water has infiltrated HVAC systems or electrical components, the risks are too high to handle without certified technicians.
Professionals bring industrial-grade equipment that can make all the difference in large-scale scenarios. Tools like moisture meters, industrial-strength dehumidifiers, and high-powered water extractors ensure thorough drying and help prevent secondary damage that DIY methods might overlook .
Mold Problems
If mold becomes extensive or keeps returning, it’s time to call in the experts. Persistent health symptoms like coughing, sneezing, or respiratory issues that worsen in specific areas of your home may point to a deeper mold problem requiring professional removal methods .
Mold-contaminated HVAC systems are another serious concern. These cases demand specialized cleaning that only trained professionals can provide, ensuring your home is safe and healthy.
Total Care Restoration Services
When the situation is beyond what you can handle, Total Care Restoration offers comprehensive flood drying and water damage restoration services. Their certified technicians are equipped with advanced tools to tackle any water damage scenario.
Their 24/7 emergency response means help is available whenever disaster strikes. Since standing water and damp materials can lead to mold, mildew, and bacteria growth within 24-48 hours, a prompt response minimizes secondary damage and keeps restoration costs under control.
To ease the stress of insurance claims, they also provide direct insurance billing, handling all documentation and communication with your insurer. This eliminates the hassle of upfront payments and complicated paperwork during an already overwhelming time.
Total Care Restoration’s services include water extraction, structural drying, mold prevention, and full restoration. For immediate assistance, you can reach them at (786) 610-6317, available 24/7.
"Water damage restoration is a complex and time-sensitive process that requires specialized equipment and expertise. Hiring a certified water damage restoration company can save you time, money, and hassle in the long run." – Proven Professional Construction Services
Conclusion
Every step in the flood recovery process, from initial safety checks to seeking professional assistance, plays a crucial role in protecting your home, health, and financial investment. With the average flood claim in 2018 reaching $42,580, taking the right actions early on can help prevent additional costly damage.
Time is of the essence when dealing with flood damage. Mold can start developing within 24 to 48 hours, and floodwaters often carry harmful pathogens like E. coli, salmonella, and shigella.
"When it comes to standing water, speed is critical to reducing property damage and minimizing mold growth." – Groundworks
A well-prepared Property Restoration Checklist Generator ensures that no critical step is missed. By systematically following these steps, you can work efficiently to salvage your property and reduce the risk of long-term damage.
It’s also important to recognize when professional help is necessary. Attempting complex repairs on your own can lead to secondary issues, such as mold growth, which may end up costing even more. Professional restoration services can often save money in the long run by addressing problems thoroughly and safely. For extensive damage, reaching out to trusted experts like Total Care Restoration can ensure the job is done right.
The success of your flood recovery depends on swift, organized action and an honest evaluation of what tasks you can handle safely. Take a moment to review your checklist one more time to make sure every critical step has been addressed.
FAQs
How can I make sure all hidden areas in my home are fully dried after a flood to avoid mold growth?
After a flood, drying out hidden areas in your home is crucial to avoid mold growth. Use industrial fans and dehumidifiers to pull moisture out of walls, floors, and those hard-to-reach spaces. A hygrometer can be a handy tool to keep an eye on humidity levels – try to maintain them below 50%. If you find wet materials like drywall, insulation, or carpet padding, remove them, especially from tricky spots like inside cabinets or behind appliances.
Pay close attention to areas like wall cavities and under flooring, and start drying them as quickly as possible. Ideally, this process should be completed within 24-48 hours to reduce the chance of mold taking hold. For widespread damage, you might want to call in professionals like Total Care Restoration. They’re available 24/7 and have certified technicians ready to help get your home back to normal.
What should I do if I think my home has structural damage after a flood?
If you think your home might have structural damage after a flood, your safety should come first. Stay out of the property if you see warning signs like leaning walls, sagging ceilings, or cracks in the foundation. These could indicate serious issues. Instead, call a professional right away to evaluate the structure.
Before any inspection, make sure the area is free of hazards like exposed electrical wires or standing water. If you’re uncertain about the safety of the space, it’s better to wait for experts to step in. For dependable help, Total Care Restoration provides 24/7 emergency services with certified technicians ready to handle water damage and related problems.
When should I call professionals for flood damage, and how can they help?
If you’re dealing with standing water that won’t go away despite your cleanup efforts, extensive damage, or worries about safety and structural integrity, it’s time to call in the professionals. They have specialized tools to dry your home completely, stop mold from forming, and uncover hidden damage that’s easy to overlook.
On top of that, professionals can manage your insurance claims for you, which can save you a lot of time and hassle during an already stressful experience. Their knowledge and tools help ensure your home is restored properly and without unnecessary delays.
Related posts
Want to Learn More?
Read our comprehensive guide covering everything you need to know about this topic.
The Complete Guide to Water Damage Restoration in South FloridaNeed Professional Help?
Our expert team is ready to assist with your water damage restoration needs.
View Water Damage Restoration Services