5 Steps for Mold Decontamination
Mold can harm your health and damage your property. Tackling it quickly and effectively is essential. Here’s a simple 5-step guide to decontaminating mold and preventing it from coming back:
- Prepare and Protect Yourself
- Wear proper safety gear: N95 respirator, gloves, goggles, coveralls, and waterproof boots.
- Inspect the area with tools like What Is a Moisture Meter the Best Measurement to locate hidden mold.
- Set up containment barriers to stop spores from spreading.
- Contain the Mold
- Seal all openings with plastic sheeting and duct tape.
- Use negative air pressure machines with HEPA filters to keep spores contained.
- Remove and Clean the Mold
- Dispose of porous materials like drywall or carpet if heavily infested.
- Clean hard surfaces with detergent, water, or vinegar, and vacuum with a HEPA filter.
- Dry and Filter the Air
- Use The Role of Air Movers in Drying Out a Flooded Space to dry the area completely.
- Run HEPA air purifiers to capture airborne mold spores.
- Restore and Prevent Future Mold
- Repair damaged structures and fix leaks.
- Maintain indoor humidity between 30%-50% and ensure proper ventilation.
- Schedule regular inspections to catch mold early.
Key Tip: Mold thrives in damp environments. Control moisture to stop it from returning.
These steps ensure a safe, mold-free home while protecting your health.
How To Do a Mold Remediation In Your Home
Step 1: Prepare and Set Up Safety Measures
Preparation is everything when tackling Mold Remediation. Once you disturb a mold-infested surface, spores can quickly become airborne, posing health risks if proper safety measures aren’t in place.
Inspect the Affected Area
Start by inspecting all surfaces for visible mold growth and any musty smells that might signal hidden mold. Tools like moisture meters or infrared cameras can help pinpoint areas where moisture is fueling mold growth. The EPA advises keeping indoor humidity between 30–50% (and never exceeding 60%) to prevent mold from thriving.
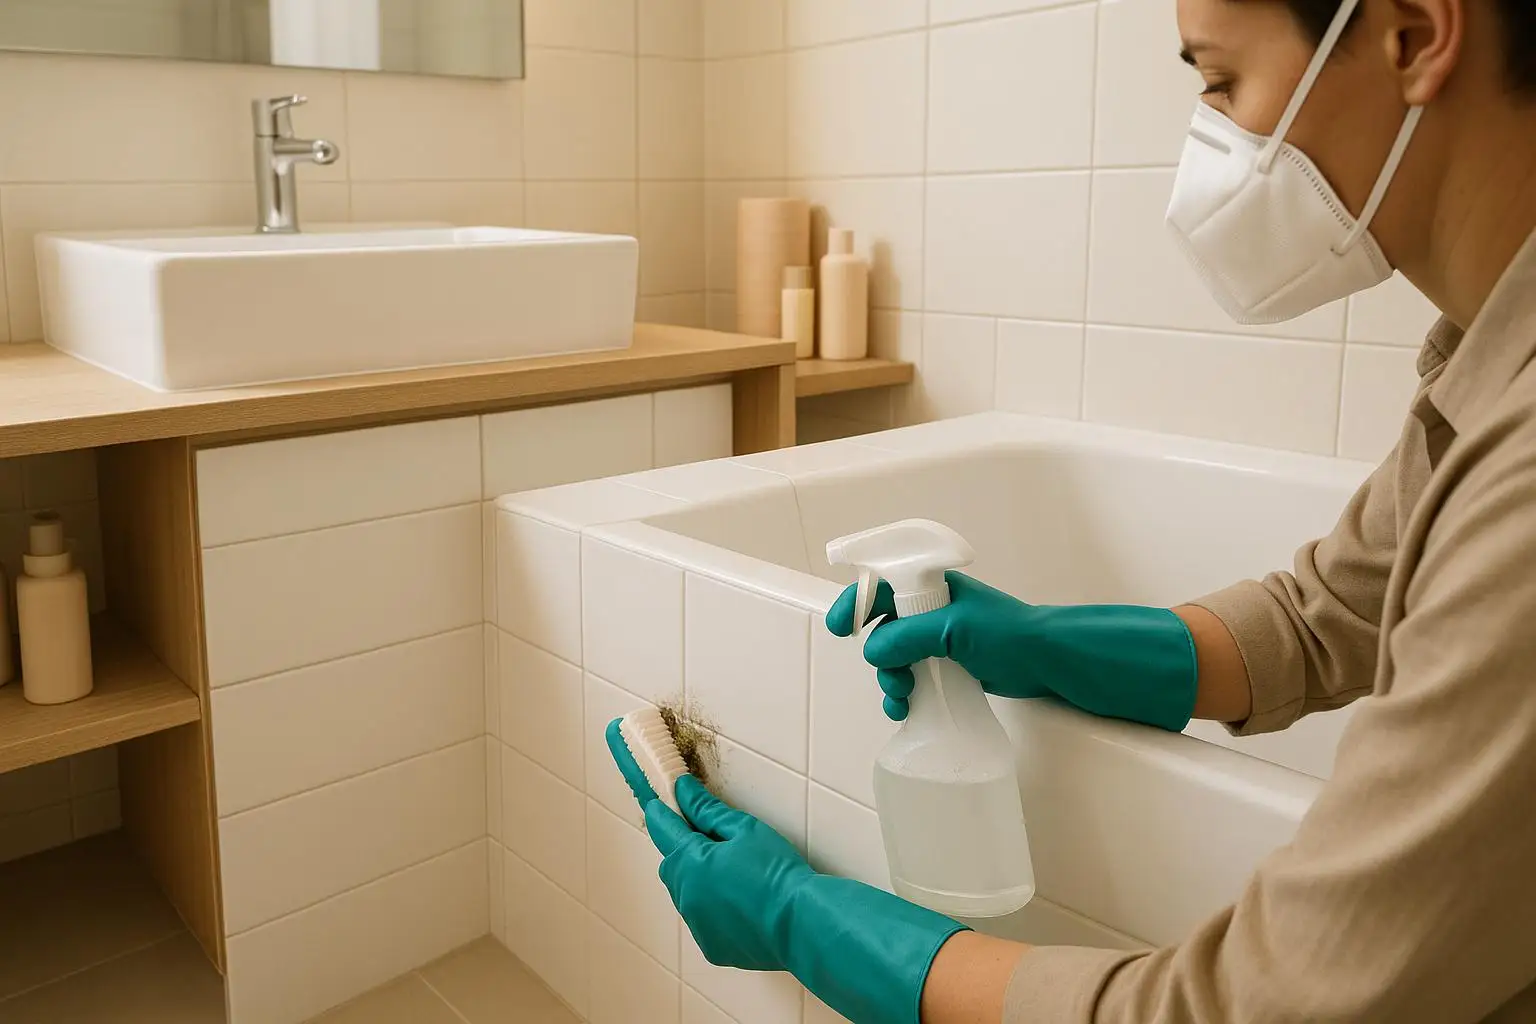
During your inspection, make sure to wear the right personal protective equipment (PPE), such as N95 respirators, gloves, and goggles. Once you’ve identified the problem areas, it’s time to gather the rest of your safety gear.
Gather Safety Equipment
Wearing proper PPE is essential to limit exposure to mold spores. According to the CDC, workers who neglect respirators in moldy environments face higher risks of respiratory infections.
Here’s what you’ll need:
- Respirators: Use NIOSH-approved N95 respirators, which filter out 95% of airborne particles. For larger jobs or areas with heavy mold, consider upgrading to a powered air-purifying respirator (PAPR). Make sure the respirator fits snugly and discard it after use.
- Gloves: Opt for nitrile or heavy-duty latex gloves with extended cuffs. For extra protection, double-layer disposable gloves when handling contaminated surfaces or strong cleaners.
- Eye Protection: Choose sealed, non-vented goggles, and add a face shield to protect against chemical splashes. Clean these thoroughly after each use with detergent and disinfectant.
- Coveralls: Disposable Tyvek® coveralls with a hood and booties are ideal for keeping spores off your clothing. Ensure all closures are tight to block contamination.
- Boots: Waterproof, slip-resistant boots made of rubber or PVC will keep your feet dry and prevent slips on wet surfaces.
| PPE Item | Minimum Standard | Why It Matters |
|---|---|---|
| Respirator | NIOSH-approved N95 or PAPR | Protects lungs from harmful airborne mold spores |
| Eye Protection | Sealed goggles + face shield | Shields eyes and skin from spores and splashes |
| Gloves | Double-layer nitrile/latex | Protects hands from spores and harsh chemicals |
| Coveralls | Disposable Tyvek® with hood | Prevents spores from clinging to clothing |
| Waterproof Boots | Rubber/PVC, slip-resistant soles | Keeps feet dry and reduces risk of slipping |
Set Up Containment Barriers
Once you’ve inspected the area and gathered your PPE, the next step is to contain the mold. Containment stops spores from spreading to other parts of your property.
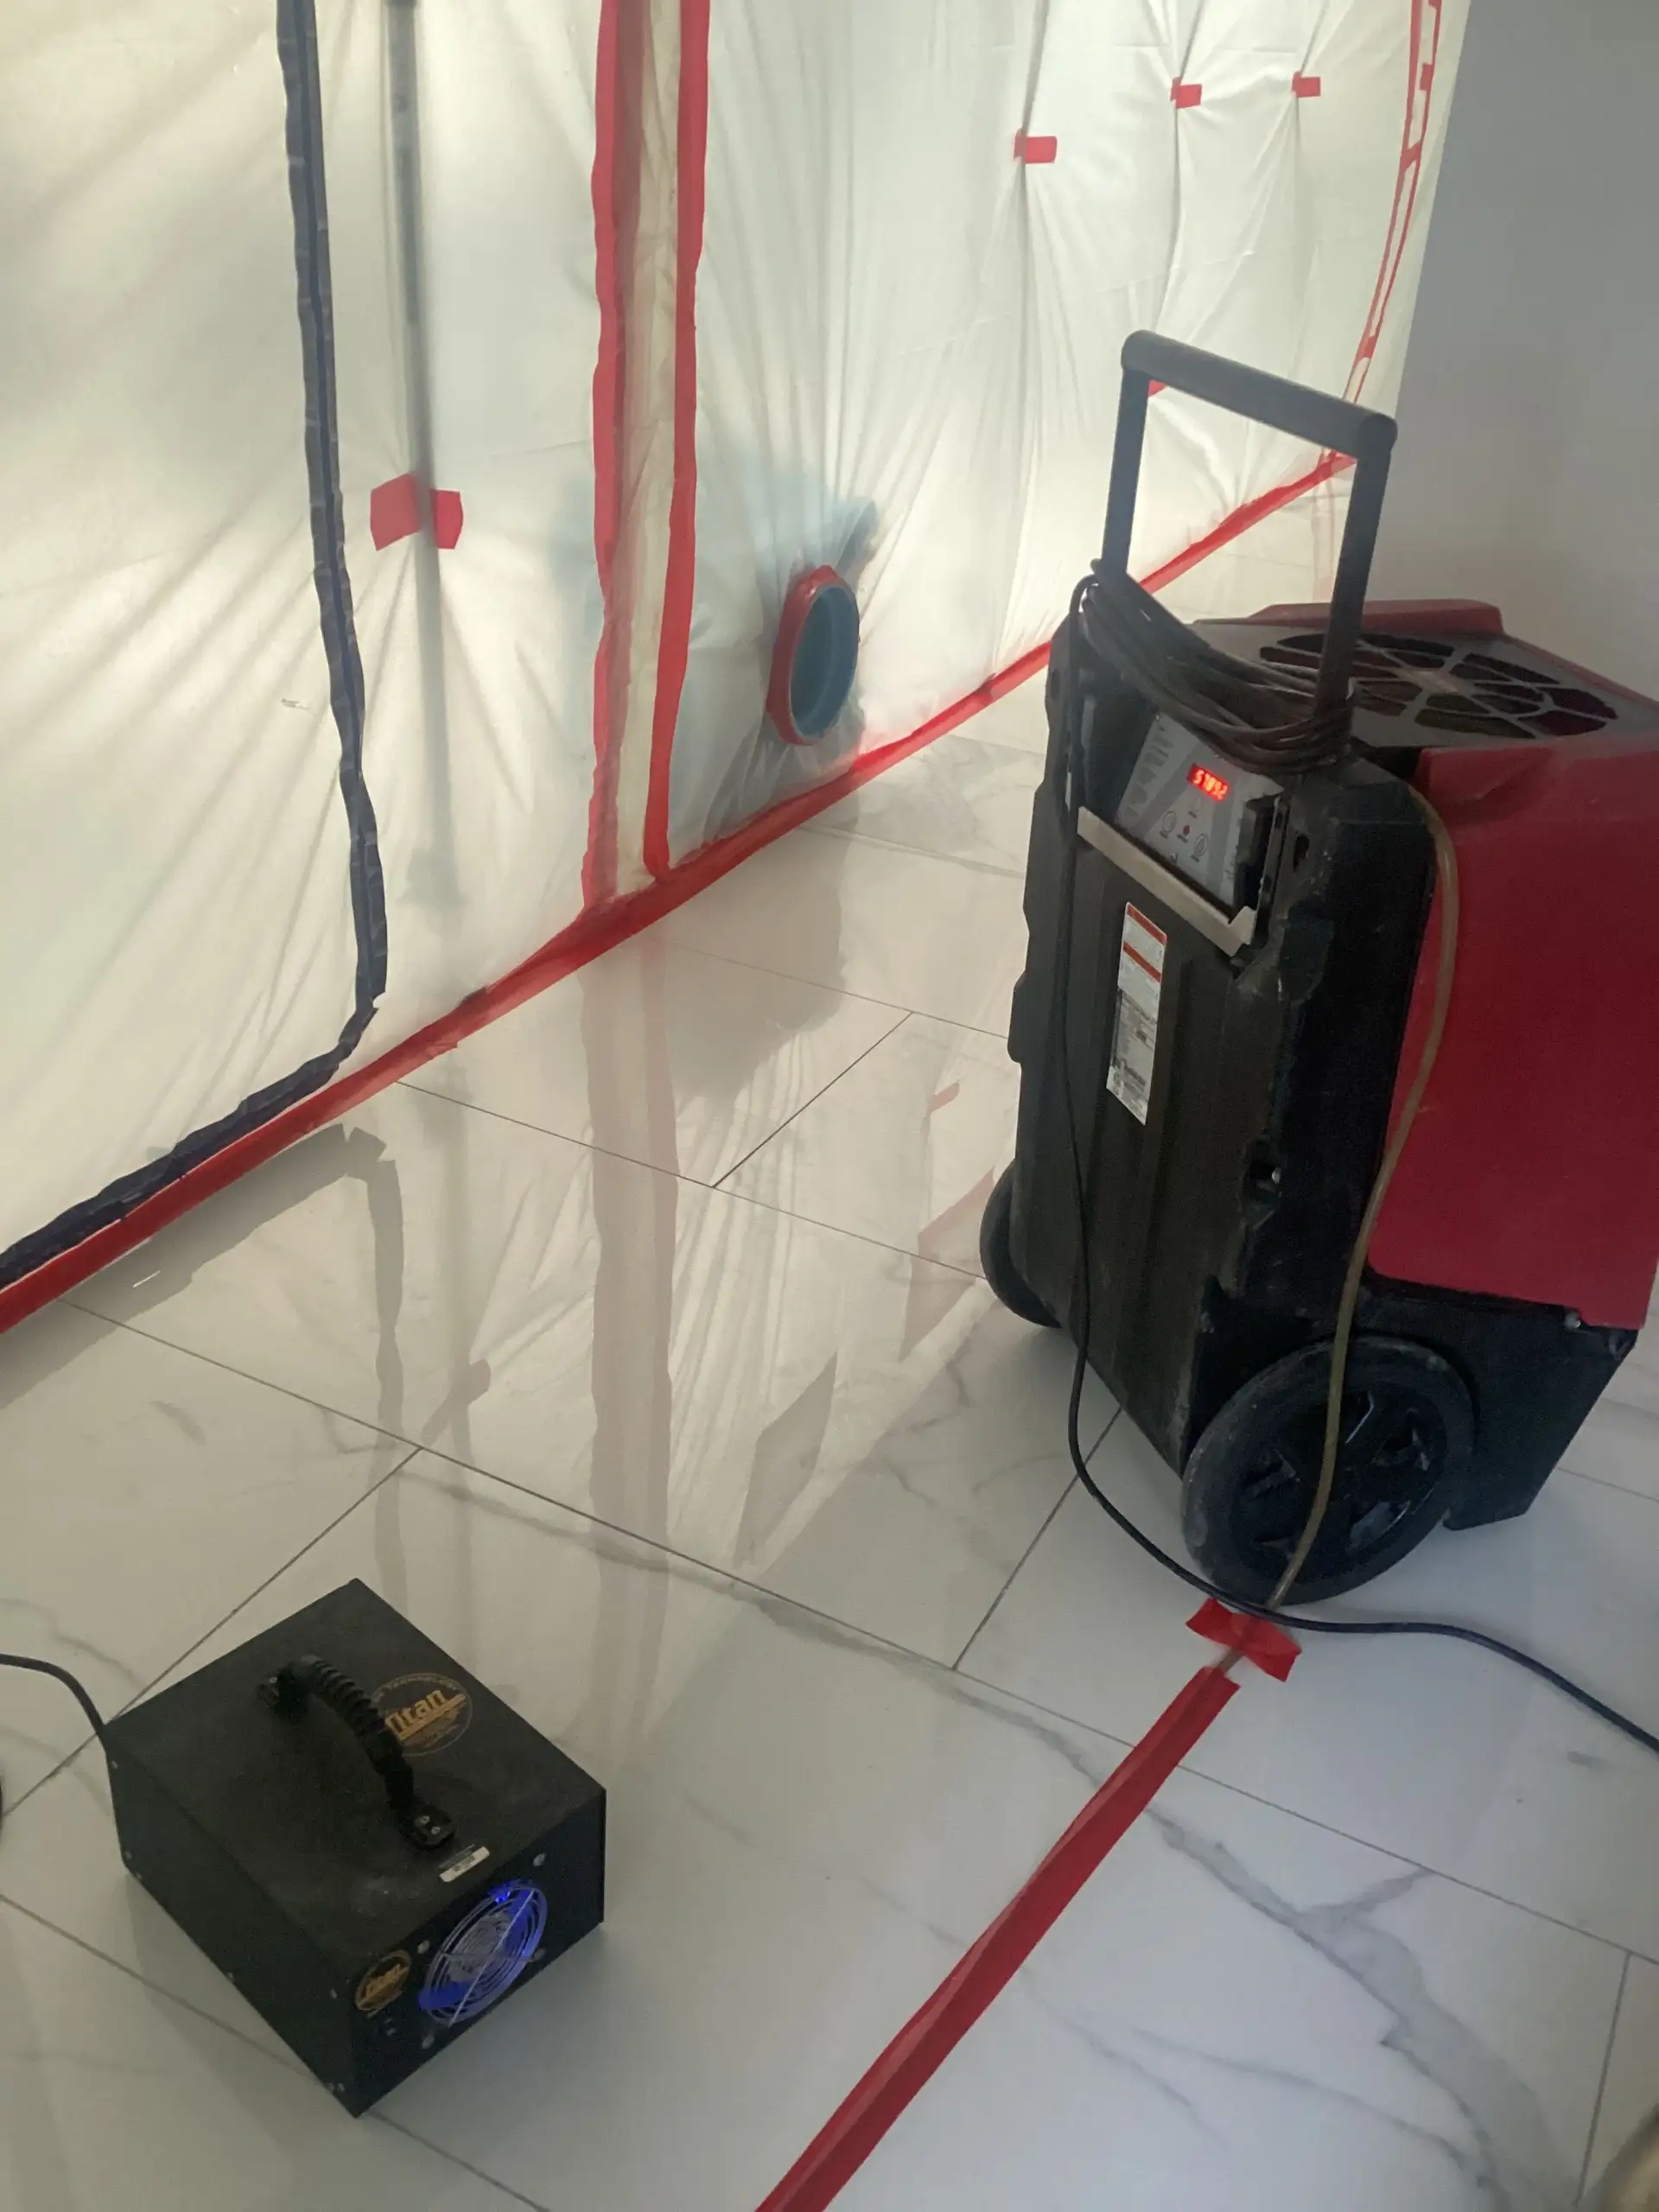
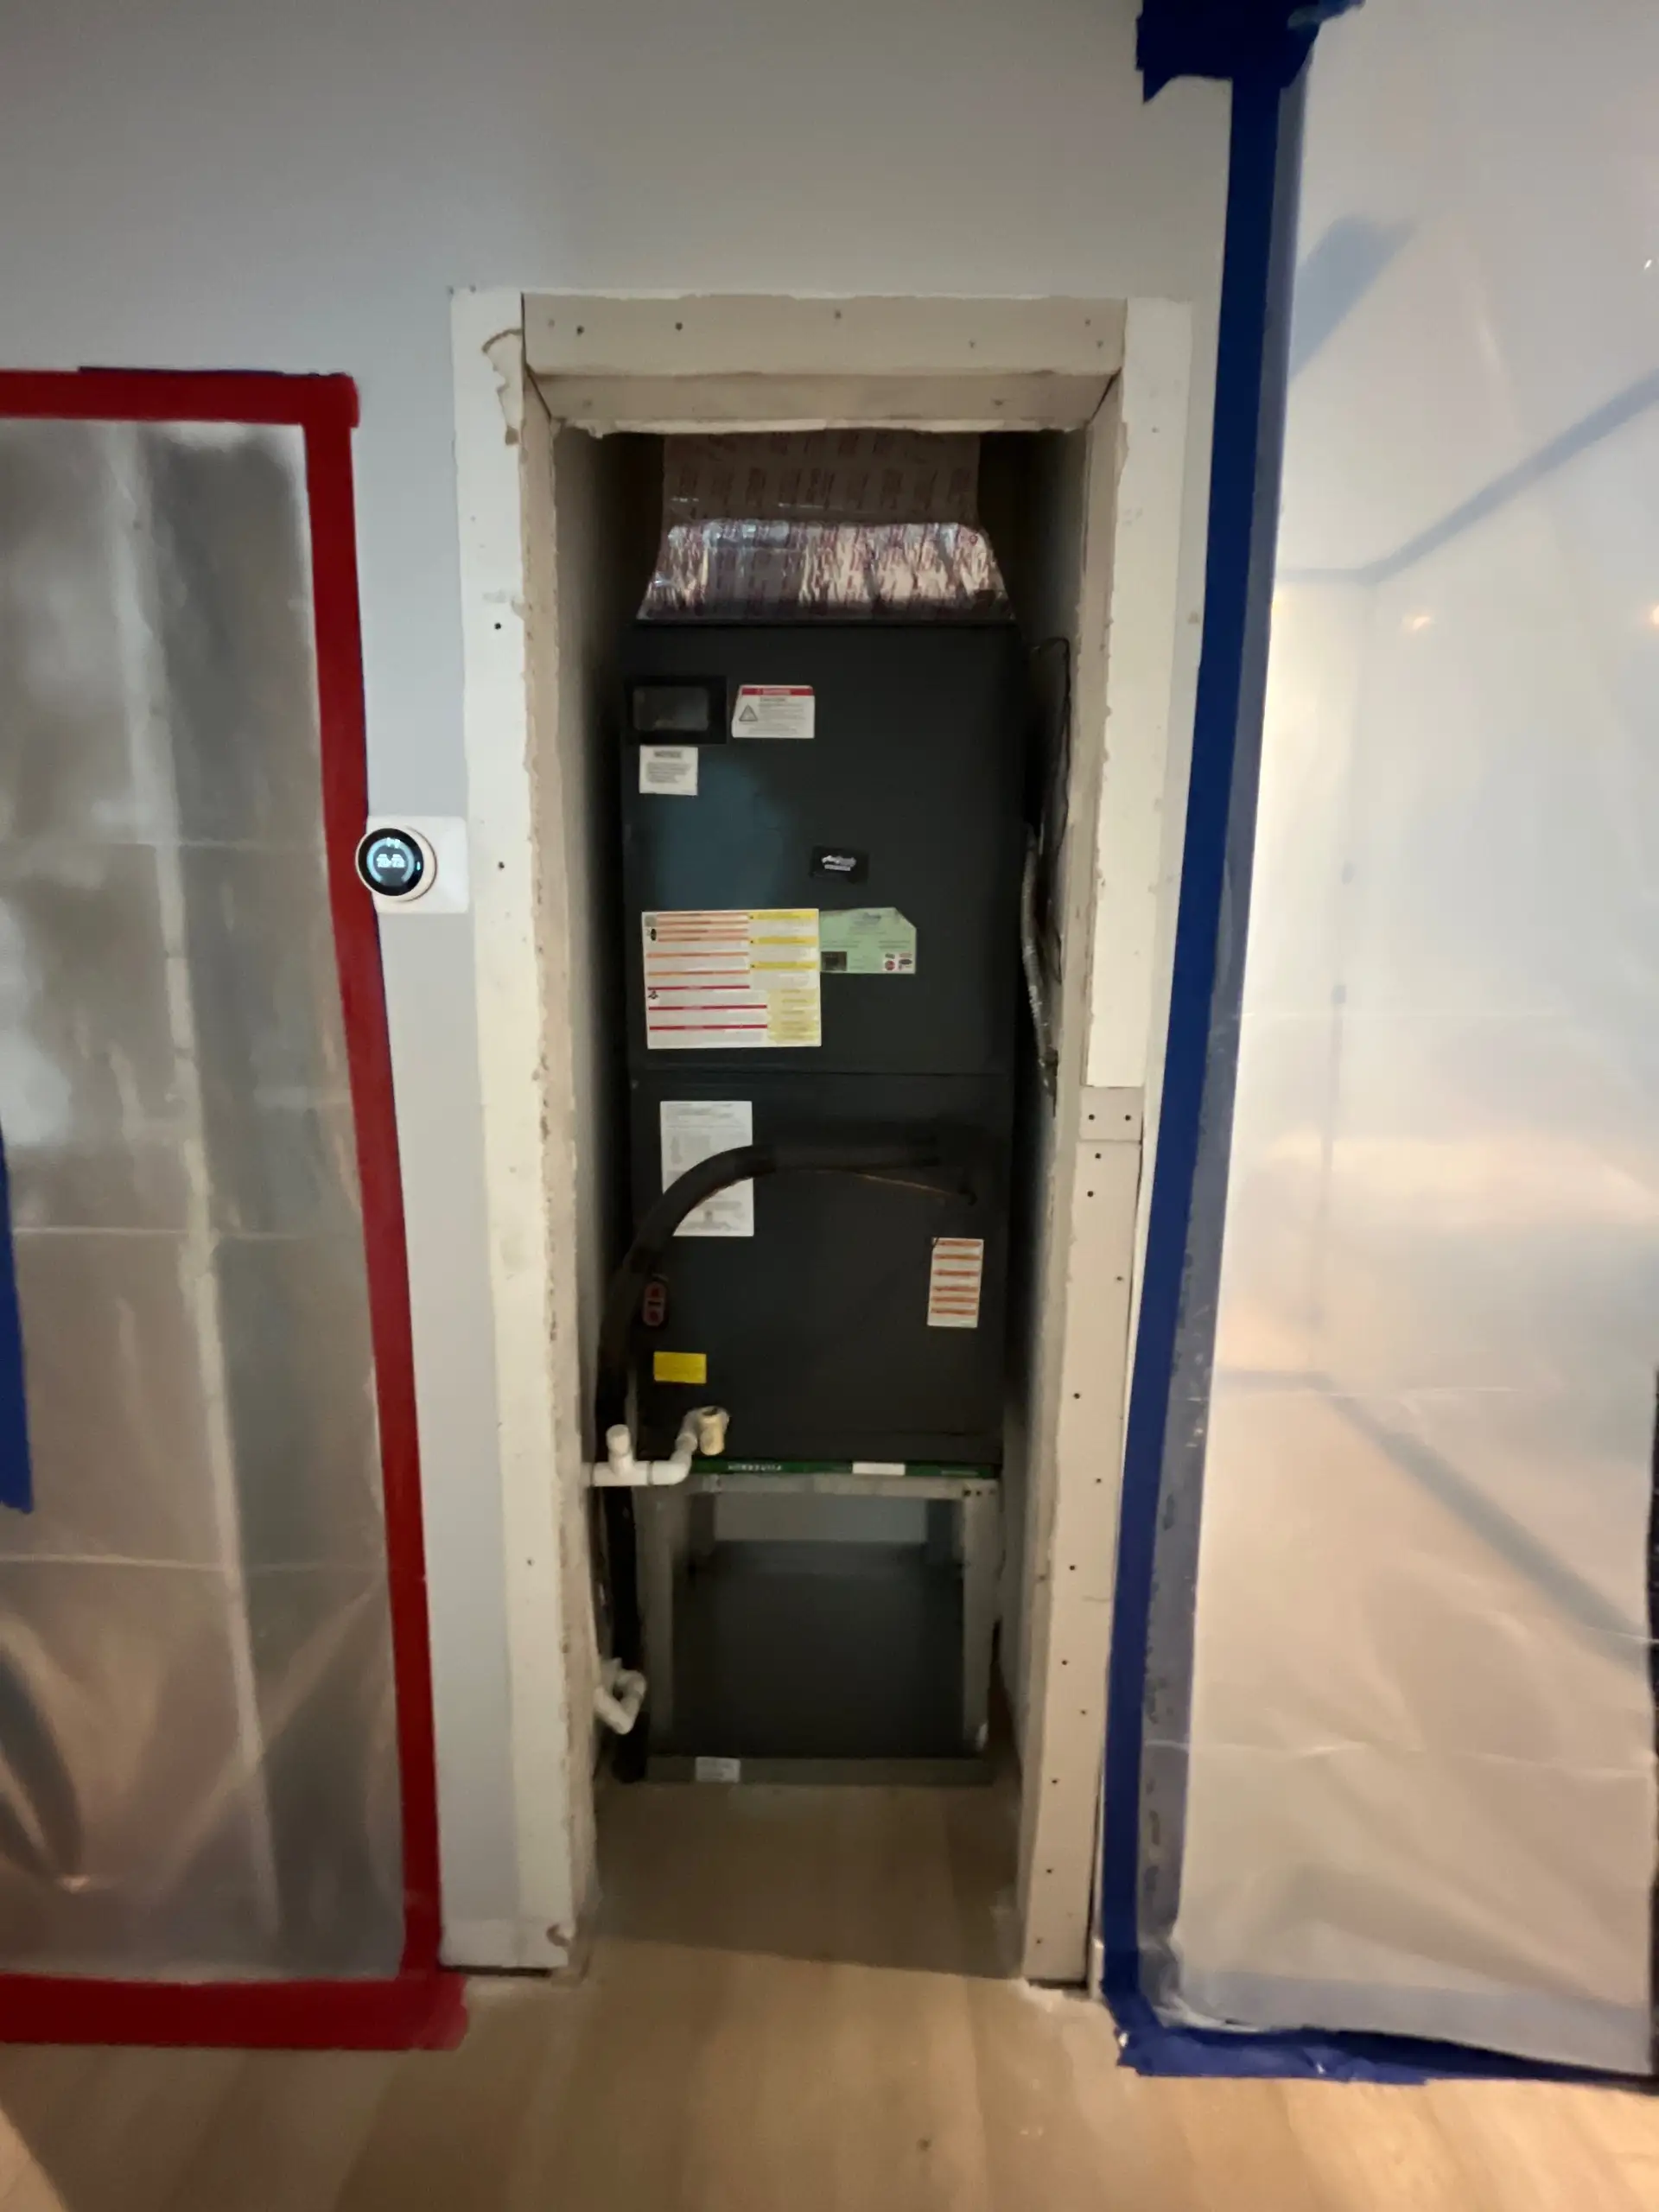
Use 6-mil polyethylene sheeting to build physical barriers around the affected area. Secure the plastic tightly to walls, ceilings, and floors using tape or fasteners, ensuring there are no air leaks. Seal off all openings – windows, doors, vents, drains, and even electrical outlets. Pay special attention to HVAC vents, as spores can easily infiltrate your heating and cooling system if left unsealed.
In January 2025, Restoration & Remediation Magazine highlighted the importance of using proper materials and maintaining airflow when creating containment with negative pressure. The KnowHow Team stressed:
"Containment is the cornerstone of a safe and effective restoration process, especially when dealing with water, mold, or hazardous materials".
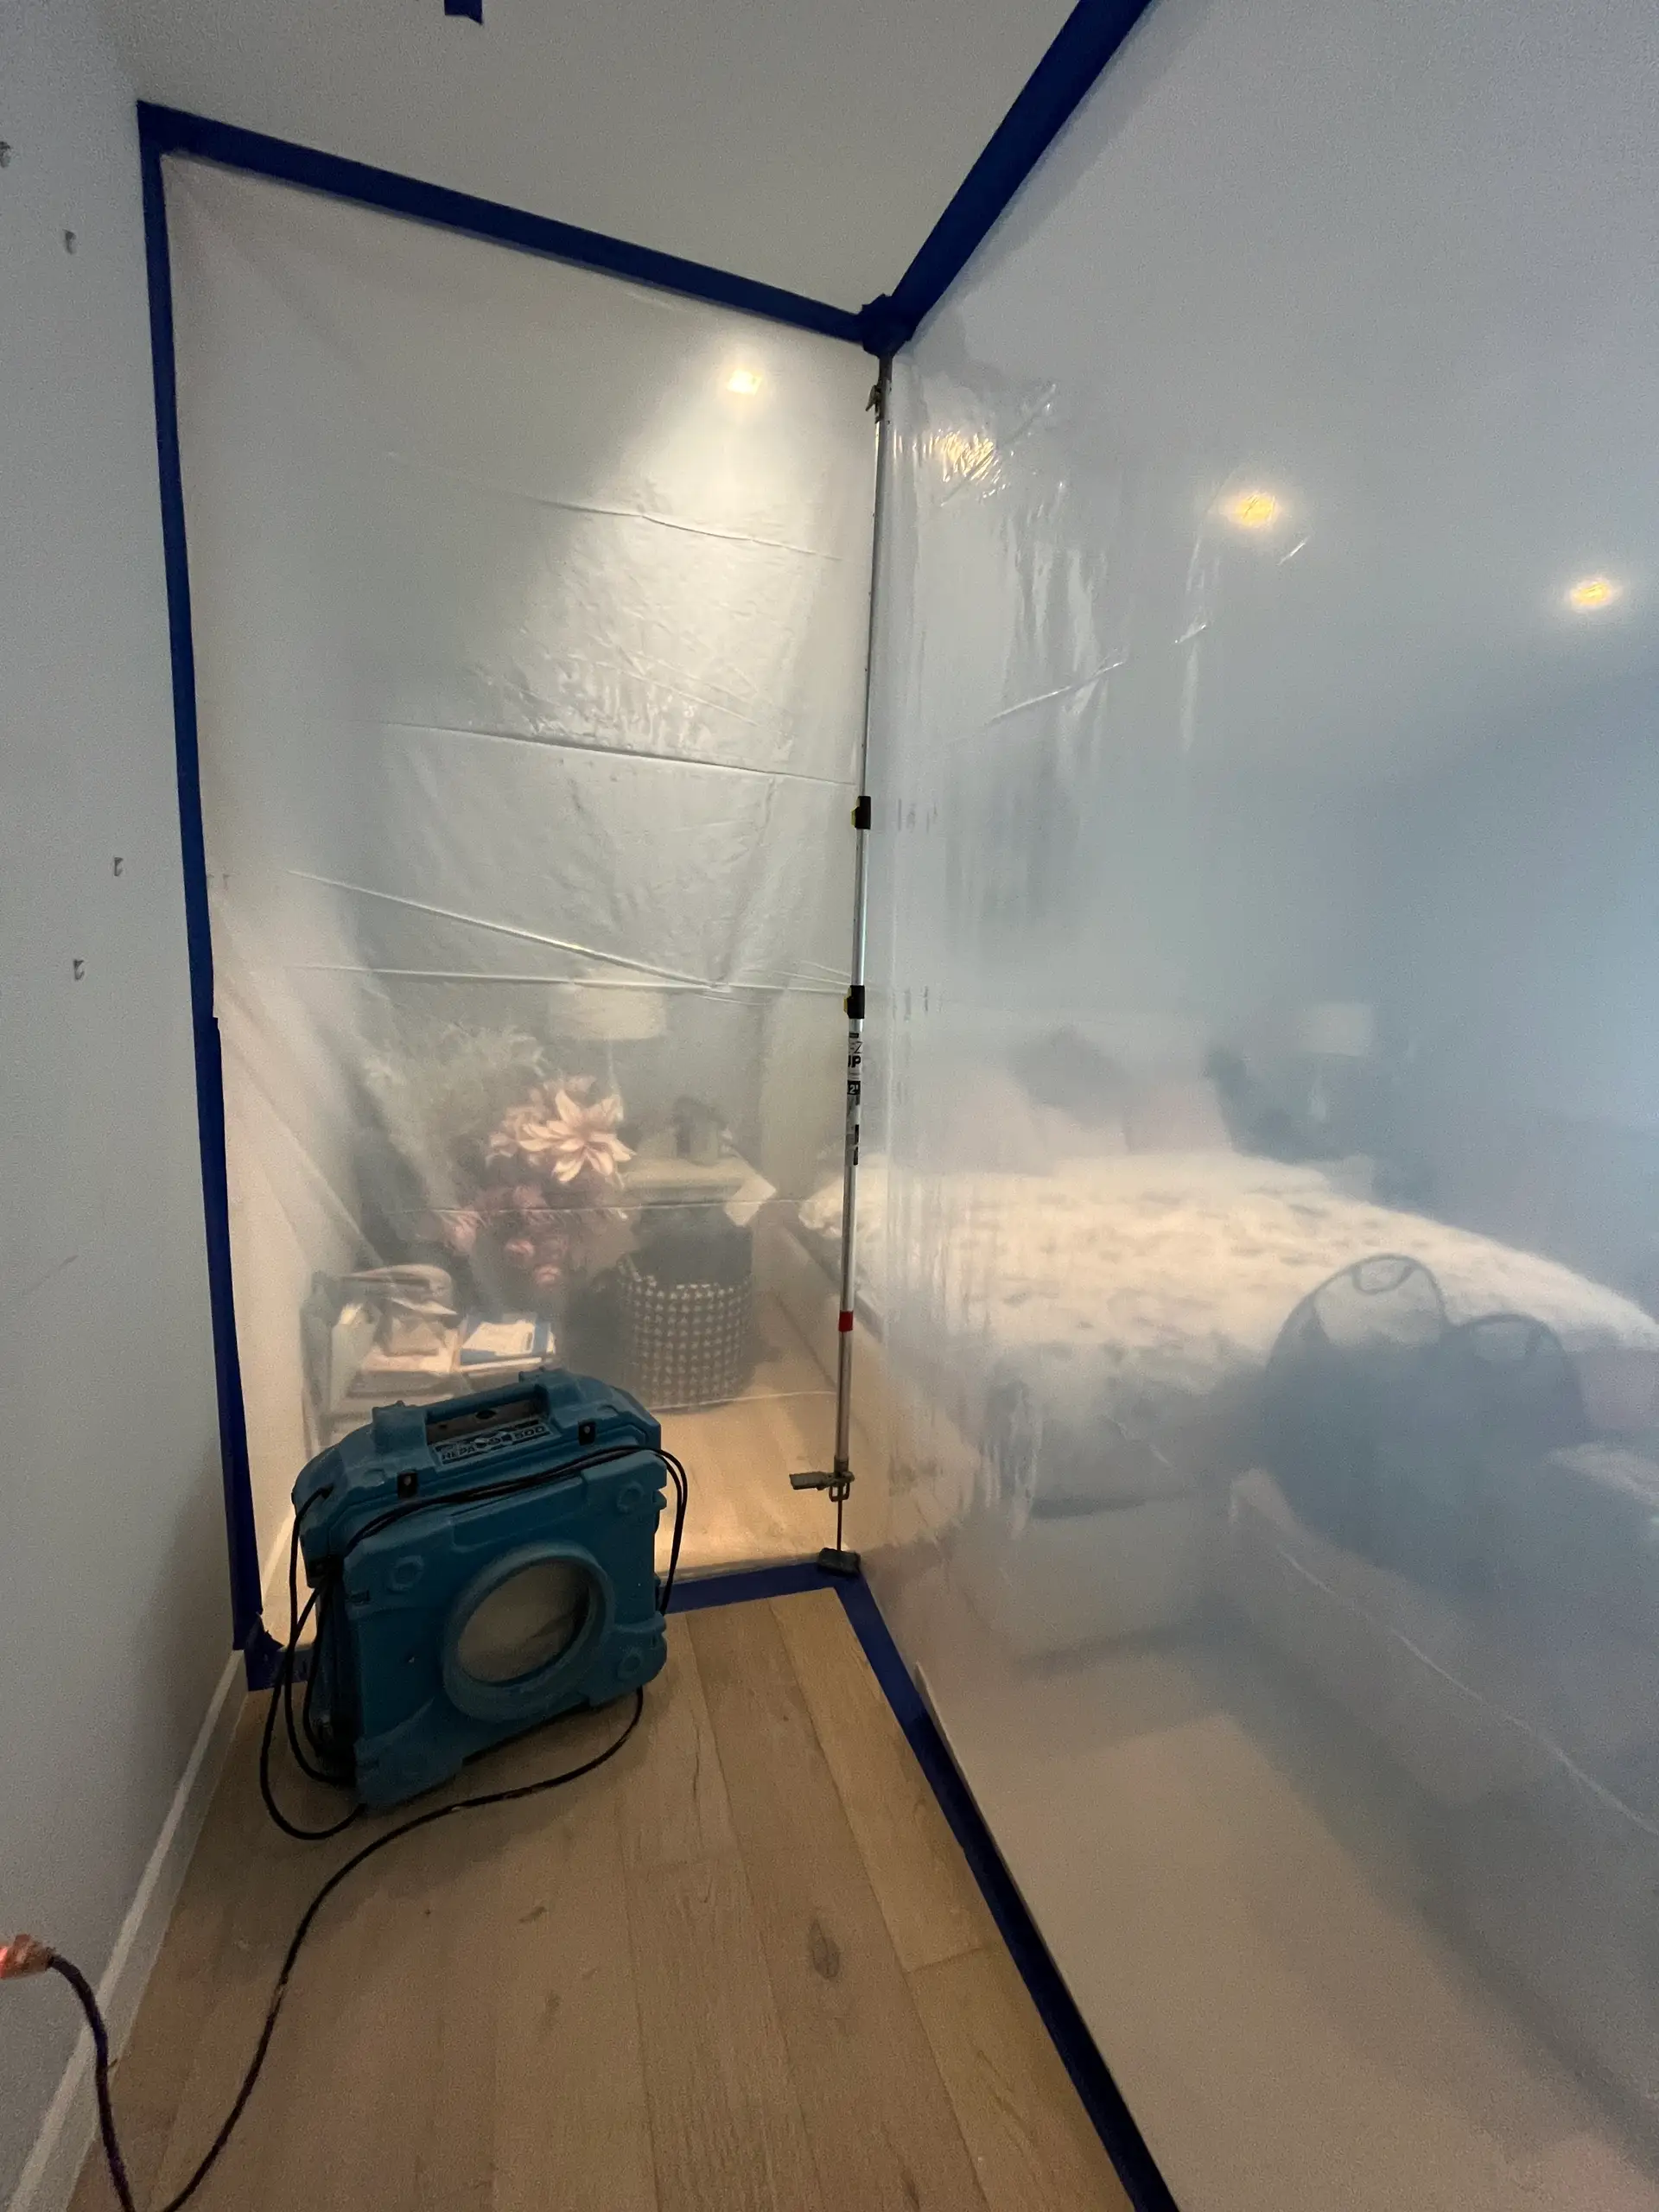
Finally, set up a decontamination chamber or airlock for entering and exiting the containment area. This prevents contamination from spreading to clean spaces and provides a place to safely remove PPE and dispose of waste.
Step 2: Contain the Mold-Infested Areas
Once your safety gear is on and the initial barriers are in place, it’s time to set up a complete containment system. This step is crucial because disturbing mold can release spores into the air, which can then spread to other parts of your property. A well-sealed containment area helps stop cross-contamination in its tracks.
Seal All Openings
Building on the barriers you created in Step 1, focus on sealing every possible opening. Use plastic sheeting to cover doors, windows, HVAC vents, and even small gaps, making sure the sheeting extends at least six inches beyond the edges of each opening. Secure everything with heavy-duty duct tape. For access points, cut a slit in the center of the plastic and cover it with a taped flap to keep it sealed when not in use.
For the containment to work effectively, it must be airtight. Check for any drafts and seal them immediately to maintain the integrity of the system.
Use Negative Air Pressure Systems
To take your containment to the next level, create negative air pressure inside the affected area. Negative air pressure ensures that air flows inward through any gaps rather than outward, Beat Miamis Humidity Top Tips for a Mold Free Home spores from escaping. This is achieved with a negative air machine (NAM), which filters and exhausts air to create a vacuum effect.
As Wei Sun, P.E., explains in the ASHRAE Journal, the higher pressure outside the containment area forces air inward, while the filtered air is expelled safely. For mold remediation, these machines use HEPA filters that trap at least 99.7% of particles as small as 0.3 micrometers – an effective solution since mold spores typically range from 4 to 20 micrometers.
To ensure the system works efficiently, maintain 12 air changes per hour (ACH) with a negative air machine equipped with a HEPA filter and an antimicrobial-treated primary filter. Use pressure gauges to monitor and confirm that the negative pressure is functioning as intended.
Follow Entry and Exit Procedures
Even the best containment setup can fail if entry and exit procedures aren’t followed carefully. Every time someone enters or leaves the work area, there’s a chance of spreading spores to clean areas. To minimize this risk, set up a decontamination chamber or airlock. This transitional space acts as a buffer between the contaminated zone and the clean areas of your property. Typically, this setup includes slits in the plastic sheeting covered by flaps – one leading from the clean area into the airlock and another from the airlock into the containment zone.
When exiting, dispose of contaminated PPE (except respirators) in sealed bags and thoroughly clean tools and booties to avoid transferring spores. These steps are essential to maintain the integrity of your containment system.
Step 3: Remove and Clean the Mold
With containment in place, it’s time to tackle the mold. Physical removal is key – don’t rely solely on biocides. Even dead mold can release chemicals and proteins that trigger reactions in people.
Dispose of Contaminated Materials
Start by assessing what can be salvaged and what needs to be discarded. Porous materials like drywall, insulation, carpet, and fabric often need to be removed if mold growth is extensive. These materials can trap mold deep within their fibers, making them nearly impossible to clean thoroughly.
Before handling any contaminated items, mist them lightly with water to reduce the spread of airborne spores. This simple step can significantly minimize cross-contamination during removal.
Place smaller contaminated items in heavy-duty, impermeable bags. For heavily contaminated materials, double-bagging is a good idea. Larger items like furniture or drywall sections should be wrapped in polyethylene sheeting and sealed with duct tape. Once sealed, wipe the exterior of the bags or wrapped items with a damp cloth and a detergent solution before moving them through the decontamination area. Be sure to check local guidelines for proper disposal of mold-contaminated waste.
After disposal, shift your focus to cleaning the surfaces that remain.
Clean Hard Surfaces
Non-porous surfaces – such as metal, glass, or sealed wood – can typically be saved with proper cleaning. The trick is to scrub these surfaces with detergent and water, then dry them completely. Physical removal of mold is far more effective than just using a biocide spray.
For cleaning, you can use an EPA-approved disinfectant or even a simple vinegar solution. White vinegar, for instance, can kill about 82% of mold species. Spray it on the surface, let it sit for an hour, and then wipe it clean .
Good ventilation is crucial during this process. Open windows and use fans to maintain airflow, which not only protects your health from spores and fumes but also helps surfaces dry more quickly.
Once the scrubbing is done, use a HEPA vacuum to capture any remaining dust or debris. This step ensures that even the tiniest particles missed during cleaning are removed, leaving the area thoroughly decontaminated.
Make sure both the cleaned surfaces and your tools stay free of spores by properly decontaminating your equipment after use.
Clean Equipment After Use
Your tools and equipment need as much attention as the surfaces you’ve cleaned. Without proper decontamination, they can spread mold to other areas.
Start with your HEPA vacuum. Empty its contents into sealed bags, and clean or replace the filters as per the manufacturer’s instructions. Wipe down the vacuum’s exterior with a detergent solution, paying extra attention to crevices where mold spores might hide.
Hand tools like scrapers, brushes, and spray bottles should be washed thoroughly with detergent and water, then dried completely. If a tool can’t be adequately cleaned, it’s best to dispose of it.
Your respirator is especially important since it protects your respiratory system. Clean the facepiece with detergent and water, and follow the manufacturer’s instructions for disinfecting it. Replace the filters and cartridges – never attempt to clean and reuse them. Store the respirator in a clean, dry location away from contaminated areas.
Lastly, clean any dehumidifiers and air movers you used. Replace or clean their filters, and wipe down their surfaces with a detergent solution. These machines will be essential for the next step, so ensuring they’re clean will prevent reintroducing contaminants into your freshly cleaned space.
"The purpose of mold remediation is to remove the mold to prevent human exposure and damage to building materials and furnishings."
Once the mold is removed and surfaces are cleaned, the next step is to dry the area and filter the air to complete the decontamination process.
Step 4: Dry and Filter the Air
Once the cleaning is done, it’s time to tackle moisture. Controlling moisture immediately is essential to stop mold from coming back. This step focuses on drying out the area and capturing any leftover mold spores floating in the air.
Use Dehumidifiers and Air Movers
Dehumidifiers and air movers are a powerful combo when it comes to drying out spaces. Dehumidifiers pull in moist air, cool it to condense the water vapor, and collect the water for removal. Meanwhile, air movers circulate air across damp surfaces, speeding up evaporation and ensuring dry air reaches every corner of the room.
"Dehumidifiers handle airborne moisture, while airmovers focus on surface drying – making them a powerful duo for minimizing water damage risks." – Pat Muller, Ready 2 Respond Trainer
For the best results, pair each dehumidifier with three to four air movers. Place the dehumidifier in a central spot to maximize airflow, and arrange the air movers in a circular pattern to remove stagnant air pockets. In larger spaces, use a crisscross setup to improve air circulation and reduce drying times.
Make sure the air movers are aimed at wet surfaces, not at each other. This ensures they push moisture out of materials effectively, while the dehumidifier takes care of the moisture in the air. Once the area is dry, it’s time to focus on improving air quality issues.
Install HEPA Air Filtration
HEPA filters are excellent for removing mold spores from the air. These filters can trap 99.97% of particles as small as 0.3 microns, which includes mold spores that typically range from 2 to 100 microns.
For the treated area, standalone HEPA air purifiers are highly effective, especially since many HVAC systems aren’t designed to handle true HEPA filters without causing airflow issues. Place these purifiers in central locations with good airflow to maximize their efficiency in capturing airborne mold spores.
If your HVAC system is capable of using higher-efficiency filters, opt for filters with a minimum MERV 13/13A rating. These filters are effective at capturing mold spores, but for even better results, consider MERV 14/14A or MERV 16/16A filters:
| MERV Rating | Average Particle Size Efficiency in Microns |
|---|---|
| 14 | 0.3 – 1.0: 75% – 84%, 1.0 – 3.0: 90% or greater |
| 16 | 0.3 – 10.0: 95% or greater |
To keep your filtration system working effectively, clean or replace HEPA filters according to the manufacturer’s instructions. Dirty filters can’t remove contaminants properly, so regular maintenance is key.
"Maintaining HVAC systems and overall building upkeep prevents health risks for occupants and potentially messy and costly mold remediation." – Mark Davidson, Manager of Marketing and Technical Materials at Camfil USA
Monitor Humidity Levels
Keeping an eye on humidity levels is critical to maintaining a dry environment. Mold thrives in conditions where humidity exceeds 60%, so consistent monitoring is a must.
Use hygrometers to measure humidity in real-time. These devices are affordable, ranging from $10 to $50 at most hardware stores, and can be placed in multiple rooms to ensure consistent control throughout your space.
Continue running dehumidifiers and air conditioners as needed to maintain ideal humidity levels. In moisture-prone areas like bathrooms, kitchens, and laundry rooms, ensure proper ventilation by using exhaust fans or opening windows when the weather allows.
Address any lingering moisture issues right away. Fix leaks promptly and insulate cold surfaces, such as pipes, to prevent condensation. Drying wet materials within 24 to 48 hours is crucial for stopping new mold growth before it starts.
"The key to mold control is moisture control." – US EPA
"Mold requires water to thrive, so by controlling the amount of moving, airborne moisture, you can control this key ingredient and prevent many mold infestations from beginning." – MoldTech
Once you’ve stabilized humidity levels and improved air quality, you’ll be ready to move on to restoring your space and setting up measures to prevent future mold inspection.
Step 5: Restore and Prevent Future Problems
Once containment, cleaning, and drying are complete, the next step is tackling structural repairs and implementing strategies to keep mold from coming back. By managing air quality and controlling moisture, you can restore your property and safeguard it against future issues.
Repair Damaged Structures
The level of structural repair depends on how much damage mold has caused to areas like walls, ceilings, and floors. Start by assessing the damage and separating materials that can be salvaged from those that need to be replaced.
For minor damage, you might only need to replace small sections of drywall. But if mold has spread extensively, a full wall replacement could be required. Repairs may also involve work on electrical systems, plumbing, drywall, and finishing materials. Before rebuilding, make sure the area has returned to normal moisture levels.
"The goal of remediation is to remove or clean mold-damaged materials using work practices that protect occupants by controlling the dispersion of mold from the work area and protect remediation workers from exposures to mold." – New York City Department of Health
These repairs are essential for creating a solid foundation for long-term 5 Steps for Emergency Mold Mitigation.
Improve Ventilation and Moisture Control
Keeping moisture levels under control is crucial for stopping mold from making a comeback. Addressing the sources of moisture buildup is your best defense.
Enhance Ventilation and Manage Humidity
Install exhaust fans in areas like bathrooms and kitchens where moisture tends to accumulate . Make sure appliances like clothes dryers and stoves vent directly outdoors. Increase airflow in damp areas and use dehumidifiers or air conditioners to keep indoor humidity between 30% and 50% – never exceeding 60% . To prevent condensation, insulate cold surfaces like water pipes and regulate temperatures in problem areas. Fix any leaks in pipes, roofs, or faucets promptly, and maintain clean gutters with proper drainage around the foundation .
"If there’s some mold in the shower or elsewhere in the bathroom that seems to reappear, increasing ventilation (running a fan or opening a window) and cleaning more frequently will usually prevent mold from recurring, or at least keep the mold to a minimum." – US EPA
Act quickly to dry any wet areas – ideally within 24 to 48 hours of water exposure – to stop mold before it starts .
These steps create a stable environment that discourages mold growth over the long term.
Schedule Regular Inspections
Routine inspections are key to catching mold problems early, before they spiral into bigger issues. Early detection helps minimize damage, reduce repair costs, and protect the health of occupants by identifying mold spores that can cause allergies or respiratory problems.
What to Watch For
During inspections, look for leaks in plumbing or other sources of dampness. Check gutters and downspouts for blockages, and inspect roofs, exterior walls, and pointing for damage. Professional mold inspectors can also identify hidden mold that might be missed during a visual check.
Protecting Your Property
Regular inspections not only help maintain a healthy living space but also protect your property’s value. Mold issues can deter potential buyers or renters, as seen in California, where visible mold can render housing unfit for habitation under the California HCD. Between professional inspections, keep air circulating by opening doors, windows, or using fans. Clean regularly – especially in damp areas like kitchens and bathrooms – and address leaks immediately to maintain proper ventilation.
By scheduling regular inspections and staying proactive, you can preserve the results of your restoration efforts and keep your property mold-free.
For expert help, Total Care Restoration offers certified technicians and 24/7 emergency services to restore your property and ensure mold stays away. Their experience with moisture control and structural repairs makes them a trusted partner in keeping your home safe and sound.
Conclusion: Key Points for Mold Decontamination
Addressing mold issues effectively requires a clear plan and attention to detail. By sticking to these outlined steps, you can significantly reduce the chances of mold returning. Successful mold remediation hinges on safety, containment, and prevention, forming the core of this process.
Safety should always come first. As emphasized earlier, wearing the right protective gear and following strict safety guidelines are non-negotiable. Containment measures are equally important to prevent mold spores from spreading to unaffected areas.
Moisture control is the cornerstone of prevention. Keeping moisture levels in check is the most effective way to stop mold from taking hold. This is especially crucial in buildings across North America, where damp conditions often create the perfect breeding ground for mold.
Act quickly to limit damage. Mold can begin to grow within 48–72 hours following water intrusion. Prompt action during this critical window can stop mold from spreading and save you from more extensive remediation efforts .
Tailor your response to the severity of the problem. For small mold patches (less than one square foot), thorough cleaning and proper disinfection might be enough. However, larger infestations, hidden moisture, or structural damage call for professional intervention to ensure the mold is fully removed and doesn’t return.
Prevention is key for long-term results. Regular inspections, maintaining indoor humidity between 30% and 50%, ensuring proper ventilation, and repairing leaks promptly are essential steps. These proactive measures not only protect your property but also help maintain a healthier living environment.
FAQs
How should I handle mold in hard-to-reach areas or inside walls?
If you come across mold in hard-to-reach places, such as behind walls or in tight corners, it’s a smart move to call in a professional mold remediation specialist. These experts have the right tools and know-how to safely locate, contain, and eliminate mold, especially in hidden spots where it can quietly spread and cause bigger problems.
For smaller, more accessible patches of mold, you can try cleaning them with natural solutions like vinegar or hydrogen peroxide. But when it comes to larger mold issues or mold on porous surfaces like drywall, it’s often best to leave it to the pros. Handling widespread mold on your own can result in incomplete removal or even spread the contamination further, which can pose serious health risks.
What steps can I take to make sure mold doesn’t come back after cleaning it up?
To prevent mold from making a comeback after cleaning, the key is managing moisture. Start by using dehumidifiers and ensuring there’s adequate ventilation, particularly in moisture-prone areas like bathrooms, kitchens, and basements. Repair leaks as soon as they appear, insulate cold surfaces to reduce condensation, and make sure to dry any wet materials within 48–72 hours to keep mold at bay.
Keep an eye out for any signs of moisture and address them immediately. A dry, well-ventilated home is your best defense against mold reappearing in previously treated spots.
What health risks can mold exposure cause, and how can I stay safe during cleanup?
Mold exposure can trigger a range of health problems, including allergies, asthma attacks, respiratory issues, skin irritation, and, in severe cases, lung infections – especially for those with weakened immune systems. Long-term exposure can make these conditions even worse.
When Ultimate Guide to Preventing And Removing Mold in Your Bathroom, it’s crucial to prioritize safety. Use protective gear such as an N95 respirator, gloves, goggles, and protective clothing to limit exposure to mold spores. If you have asthma, allergies, or other health conditions, it’s best to stay out of mold-infested areas during cleanup to avoid potential risks. Make sure the space is well-ventilated and follow all recommended safety measures to safeguard yourself and those around you.
Related posts
Want to Learn More?
Read our comprehensive guide covering everything you need to know about this topic.
The Complete Guide to Mold Remediation in FloridaNeed Professional Help?
Our expert team is ready to assist with your mold remediation needs.
View Mold Remediation Services