Proof of Loss Timeline After Water Damage: What Happens in the First 7 Days
Proof of Loss Timeline After Water Damage: What Happens in the First 7 Days
A proof of loss water damage claim gets confusing fast when your adjuster is asking for paperwork while cabinets, flooring, or drywall are still wet. The real challenge is keeping the file organized while emergency drying starts, receipts pile up, and new damage shows up by the hour.
That is why the first week matters so much. The EPA says wet materials should generally be dried within 24 to 48 hours to reduce mold growth. At the same time, both the National Association of Insurance Commissioners and the Insurance Information Institute tell homeowners to report the loss promptly, document damage with photos and lists, and keep receipts for emergency expenses.
A proof of loss can be part of that paper trail, but it is not the whole job. For example, FEMA says National Flood Insurance Program claims require a signed proof of loss within 60 days of the date of loss, with supporting documents. Other water-damage claims may use different forms, different deadlines, or no sworn statement unless the carrier asks for one. The safest move is to build the file correctly from day 0.
Fast drying protects the house, but it also creates the first layer of claim evidence: photos, equipment placement, and a timeline of what happened when.
Why the first week after water damage matters
The first seven days usually decide whether your file feels organized or chaotic. You are trying to do two things at once: protect the property from getting worse and preserve enough detail for the insurance side to make sense later.
| Time window | Priority | Evidence to save |
|---|---|---|
| Day 0 | Stop the loss, make the area safe, document before cleanup | Wide room shots, close-ups, source photos, first notes on time and cause |
| Day 1 | Open the claim, start mitigation, prevent secondary damage | Claim number, temporary-repair receipts, emergency contractor notes, hotel or meal receipts if displaced |
| Days 2-3 | Turn drying activity into usable documentation | Moisture readings, equipment list, updated progress photos, damaged-item inventory |
| Days 4-7 | Organize the file for adjuster follow-up or extra paperwork | Estimates, unanswered scope questions, any form or deadline request from the carrier |
That timeline is more practical than obsessing over form names too early. If the file is organized, you are in a much better position to answer the adjuster, a mitigation company, or your insurer if they ask for more support.
Day 0: Stabilize the property and start the claim file
Start with safety and visibility. Shut off the water source if you can do it safely, stay out of standing water near electrical hazards, and document the loss before furniture gets moved or drywall gets opened.
Total Care Restoration's emergency water damage checklist is a good model for day-0 photos because it calls for room-by-room wide shots, close-ups of damaged walls, ceilings, flooring, and photos of any structural damage. The NAIC also says to make a list of damaged property and take photos and videos before repairs begin.
Create one claim folder immediately. It can be a cloud drive folder, a notes app, or even a paper folder plus phone album, but keep the same categories from the start:
- time the damage was discovered
- when the source was shut off
- every person or company you called
- every photo and video batch
- every receipt or invoice
If a plumber, roofer, or electrician identifies the source early, save that write-up too. Day-0 notes often answer later questions about whether the damage was sudden, active, or already spreading when you found it.
Early inspection photos work better when they show the whole room first, then the damaged materials, then the suspected source of the water.
Day 1: Report the loss and preserve emergency-mitigation proof
By day 1, your goal is to open the claim and keep the house from deteriorating further. The Insurance Information Institute says to call your insurer or insurance professional as soon as possible, make reasonable temporary repairs, photograph the damage, and save receipts. It also says not to throw away damaged items before the adjuster has seen them when keeping them is practical.
That does not mean you should leave the house wet while you wait. Total Care Restoration's emergency checklist says to start cleanup and drying immediately and specifically notes there is no need to wait for the adjuster to arrive before beginning the drying process. That is an important distinction: protect the property, but document what you did.
Useful day-1 questions to ask the carrier or adjuster include:
- What is my claim number, and where should I send documents?
- Do you want emergency-mitigation invoices as they come in or as one packet later?
- Should I keep removed materials or only photograph them before disposal?
- Is there any form or sworn statement you already know I may need?
If the loss is still active or the house is unsafe, call an emergency restoration team instead of guessing your way through it. A fast response helps the house and gives you a cleaner timeline for the file.
Days 2-3: Build the documentation packet while drying starts
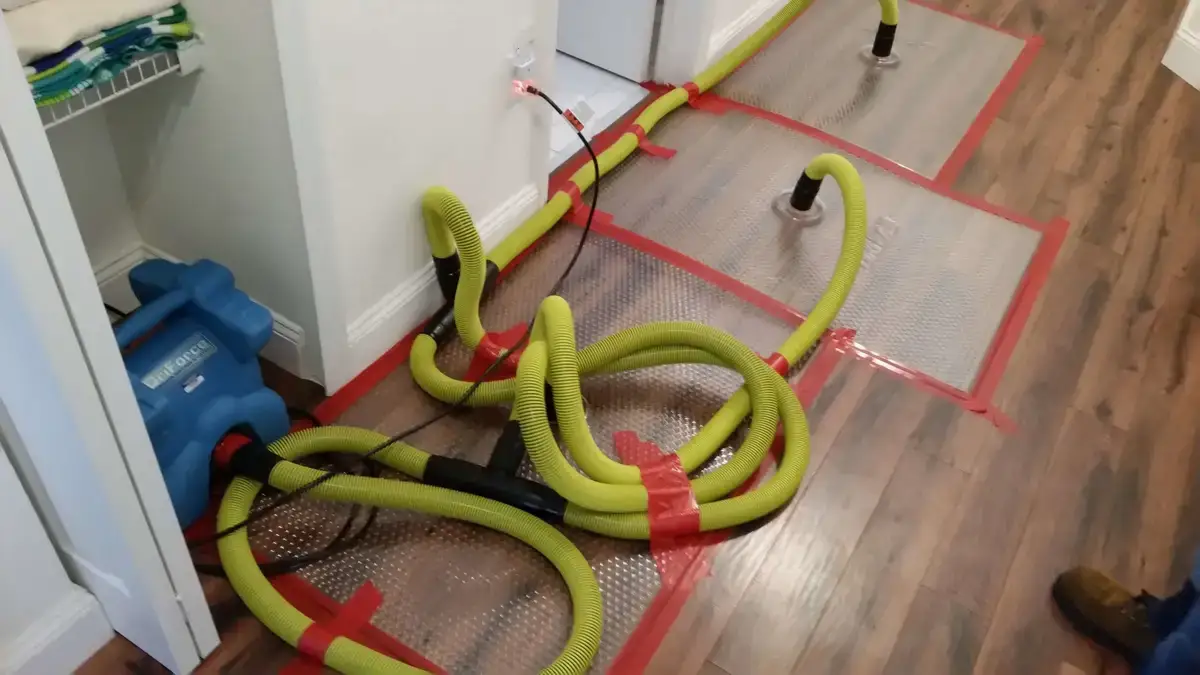
This is the stage where a messy claim starts to become a usable claim. Once extraction is done, the dry-out phase usually shifts into equipment placement, moisture checks, and daily progress tracking.
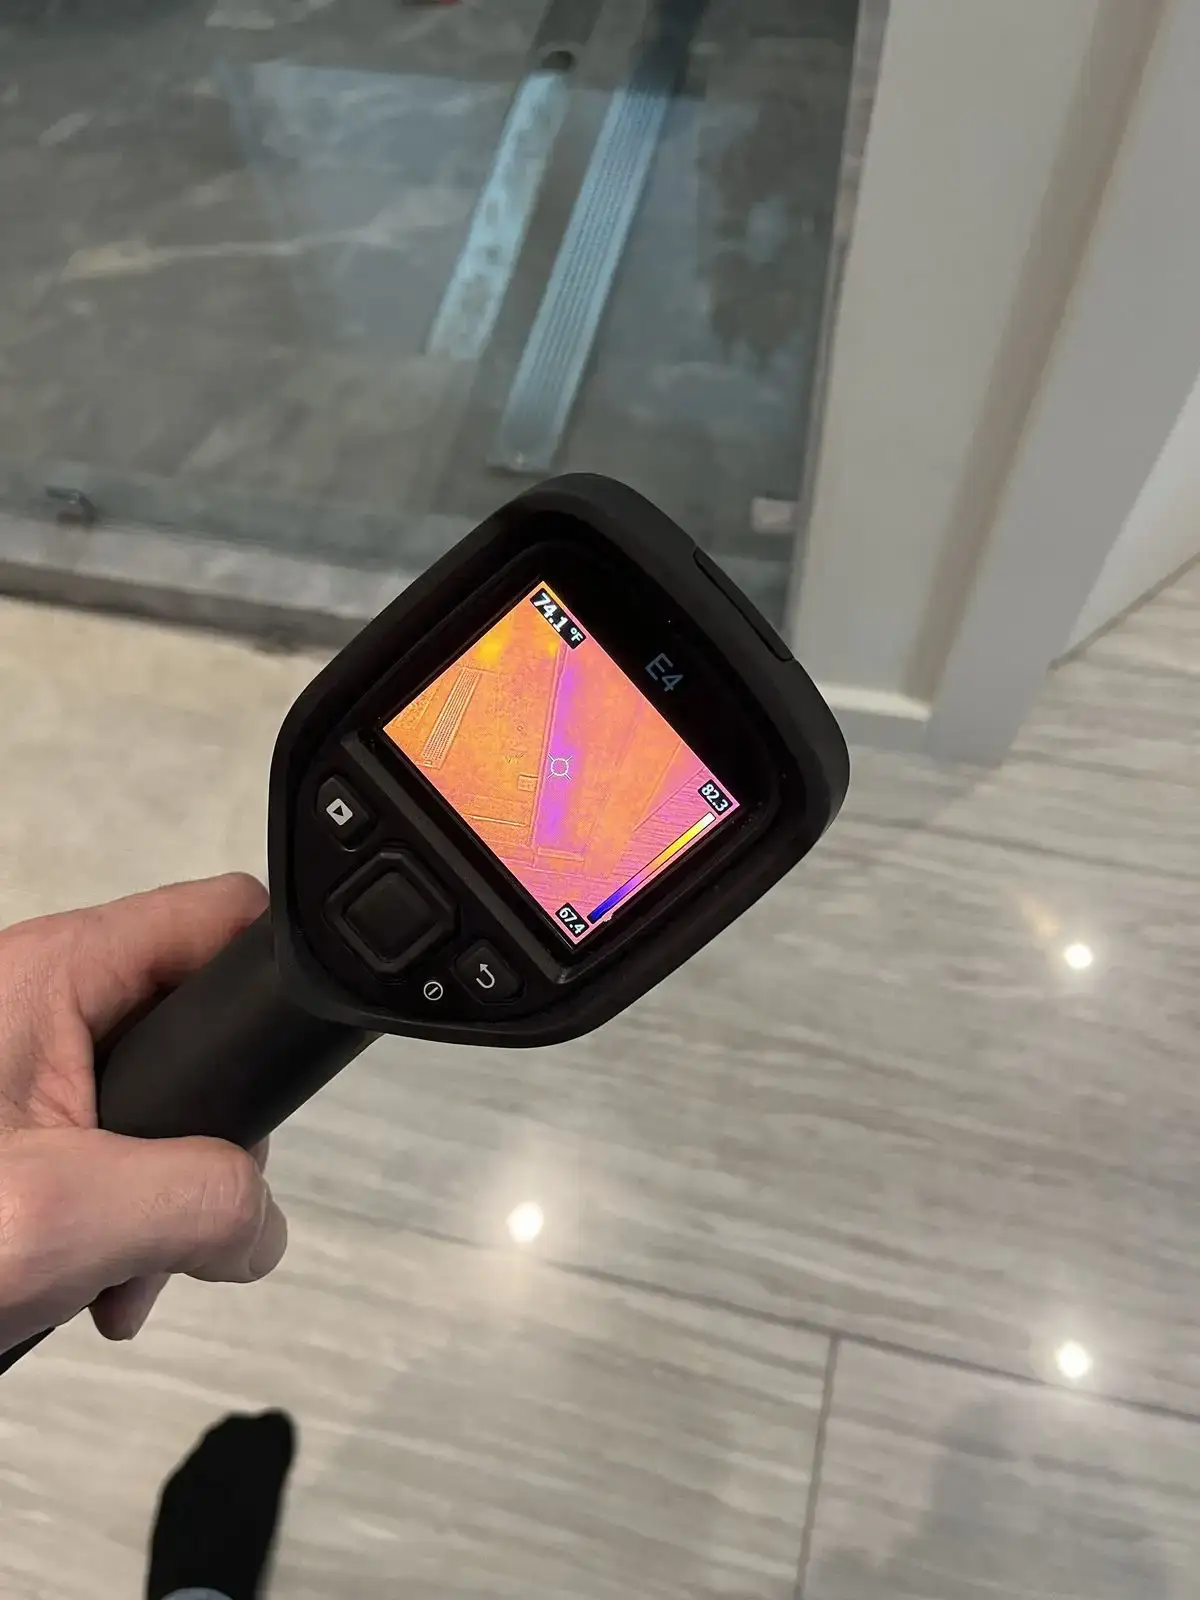
Total Care Restoration's water damage restoration guide says technicians take initial moisture readings, use thermal imaging and moisture meters to find hidden water, and check moisture levels daily until drying is complete. Its timeline article says the drying and dehumidification phase typically runs at least three to five days for standard losses, with daily monitoring and progress documentation along the way.
That matters because drying records answer the question an adjuster often has but a homeowner cannot easily prove from memory: was the structure still wet, and how did conditions change over time?
Your days 2-3 packet should usually include:
- updated photos from the same angles you used on day 0
- moisture readings or technician logs when professionals are involved
- a list of equipment placed in the home
- emergency invoices and work authorizations
- a growing inventory of damaged belongings
If you are trying to explain how big the event was, Total Care Restoration's water leak volume calculator can help you estimate gallons from flow rate and duration. That estimate does not replace moisture mapping, but it can help explain the scale of the event to contractors or an adjuster.
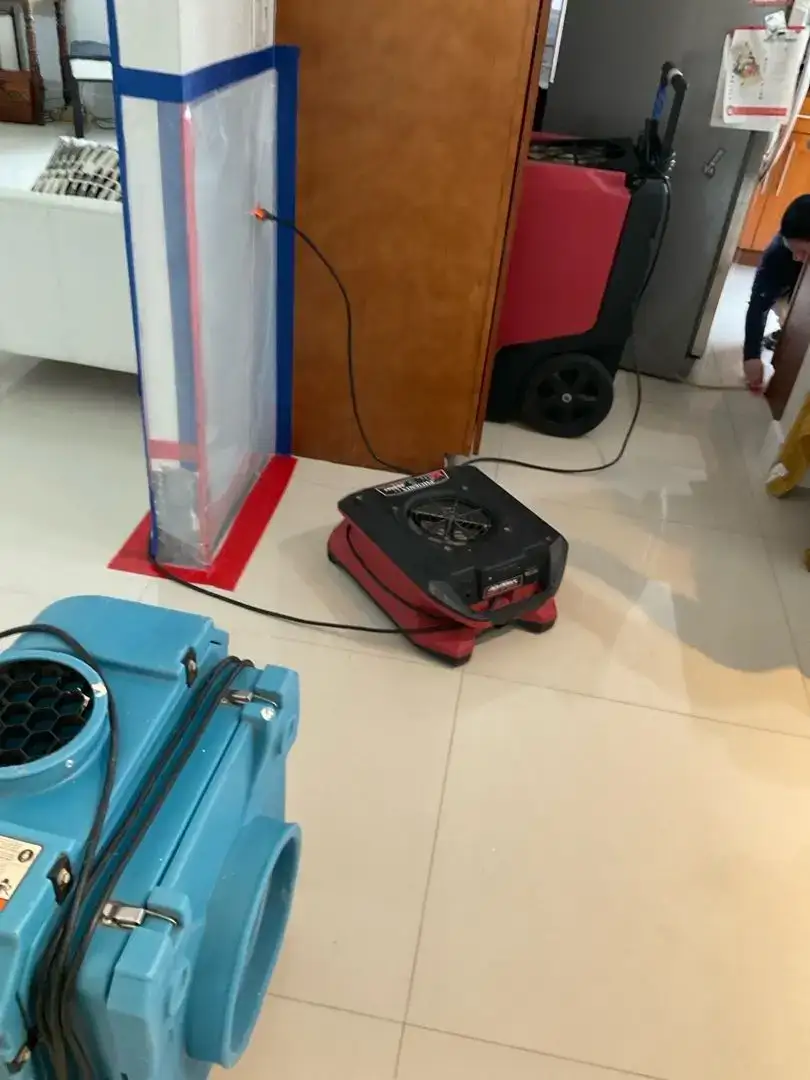
Drying equipment by itself is not the evidence; the useful part is the combination of equipment placement, dates, readings, and progress photos.
Days 4-7: Organize drying records, scope questions, and proof-of-loss prep
By the second half of the first week, you should know whether the claim is staying simple or whether the carrier wants more formality. This is when the phrase proof of loss tends to show up.
In plain English, a proof of loss is a signed statement of what you are claiming, usually backed by supporting documents. The exact form and timing depend on the type of policy and the claim. FEMA gives the clearest public example: for NFIP flood claims, a signed proof of loss is due within 60 days of the date of loss, and the packet should include a building-damage estimate plus a personal-property inventory. FEMA also says you can still submit a supplemental claim later if more damage is found.
For ordinary non-flood water claims, do not assume the FEMA timeline applies. Instead, ask your insurer in writing:
- Are you requesting a proof of loss, or just photos and estimates?
- What exact deadline applies to my claim?
- Do you want my contractor's estimate, my adjuster's estimate, or both?
- Can I supplement the claim later if hidden damage appears during drying or demolition?
This is also the point where good organization pays off. If your file already has photos, receipts, moisture logs, and names with dates, answering follow-up questions gets much easier.
What a complete water-damage file should include
A strong first-week file is not fancy. It is complete.
- Room-by-room wide shots plus close-ups of damaged materials and belongings.
- A written inventory of damaged items, with receipts or replacement references when available.
- Emergency invoices for extraction, drying, plumbing, tarping, electrical safety work, or temporary housing.
- Progress photos that show how the house looked before drying, during drying, and after equipment changes.
- Moisture readings, drying logs, or technician notes from the water damage dry-out process whenever a professional team is involved.
- Communication notes with dates, names, phone numbers, and what each person asked for.
- Any form, deadline email, or document request from the insurer or adjuster.
- If available, a home inventory, which the NAIC says can make claim filing easier.
Moisture documentation is especially valuable because hidden water does not show up in a single snapshot. Total Care Restoration's guide to 5 types of moisture meters explains why restorers use different tools for material readings, humidity tracking, and thermal scanning during a dry-out.
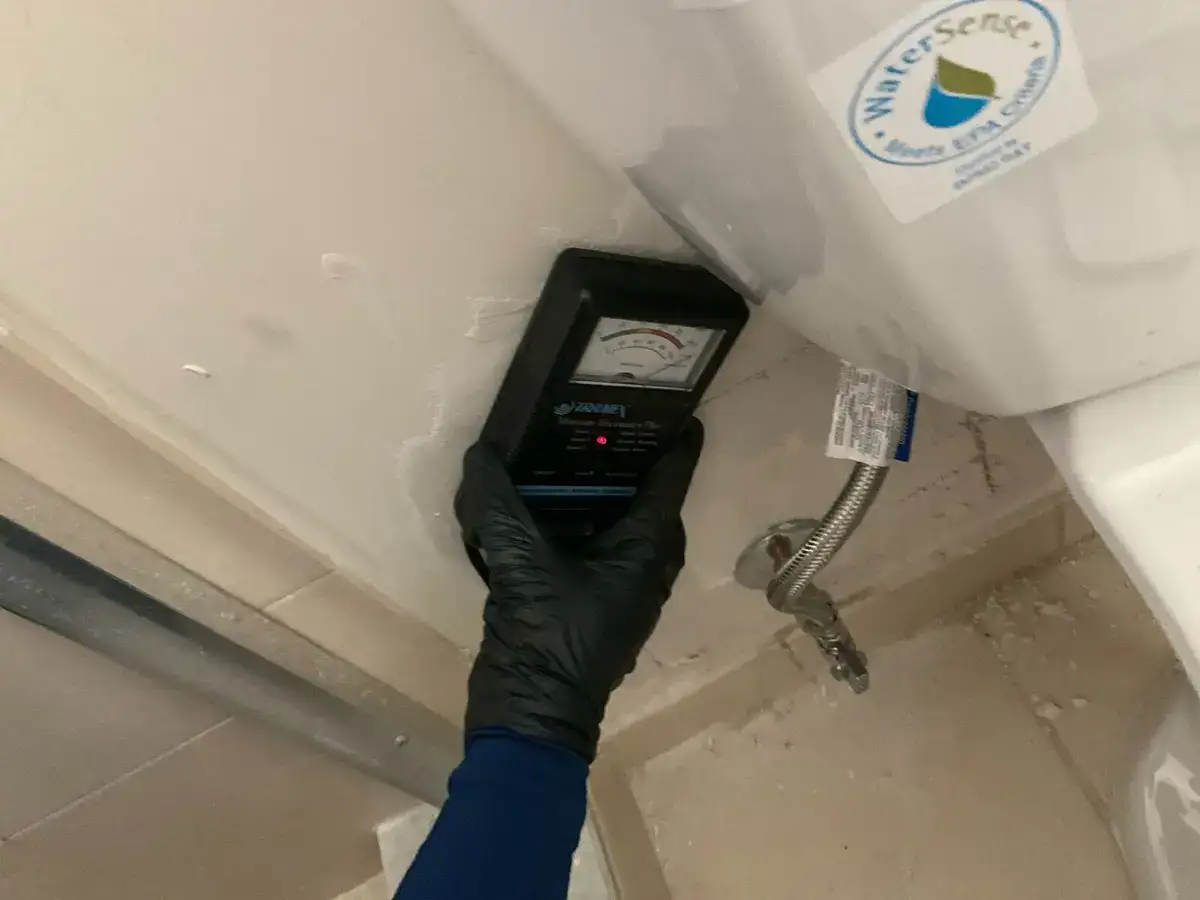
Moisture logs help connect the visible damage to the less visible question that matters later: what was still wet, and when did it finally dry?
Questions to ask before you sign or submit anything
Not every document in a water claim does the same job. Before you sign, slow down long enough to identify what the paper actually is.
Ask these questions first:
- Is this a proof of loss, an estimate approval, a work authorization, or something else?
- Does signing this limit my ability to add hidden damage later?
- Which supporting documents are still missing from my file?
- Should I keep damaged materials or personal property for inspection first?
- Who should receive updated invoices, drying logs, and supplemental photos?
The Insurance Information Institute also warns homeowners not to be rushed into signing contracts after a disaster. If a form is unclear, blank, or inconsistent with what the adjuster told you, stop and ask for clarification before you sign.
When to bring in professional help
Some losses move beyond normal homeowner documentation fast. If water affected multiple rooms, reached ceilings or wall cavities, involved sewage or contaminated water, or left the HVAC system in question, it is time to escalate. Total Care Restoration's water-damage guide specifically notes that hidden moisture behind walls and under floors can keep causing damage even when surfaces look better.
Professional help matters for two reasons here: it protects the building, and it creates better records. A qualified team can produce moisture readings, drying logs, equipment notes, and photo documentation that are much harder to recreate later from memory.
If your home is still wet now, start with water damage restoration service or call Total Care Restoration for 24/7 emergency help. The form can wait a few hours. The wet materials usually should not.
The bottom line: treat the first week as a documentation sprint, not just a cleanup sprint. When the house is safer and the file is organized, proof-of-loss questions become much easier to answer.
This article is general educational information, not legal, public-adjuster, or insurance-coverage advice. Ask your insurer or a licensed advisor which forms, deadlines, and repair rules apply to your specific claim.
Need Professional Help?
Our expert team is ready to assist with your total care restoration needs.
View Total Care Restoration Services