Why Emergency Roof Protection Matters
A damaged roof is more than an inconvenience—it's an emergency. Every hour your roof remains exposed, water can enter your home, damaging ceilings, walls, floors, and belongings. In South Florida's climate, where afternoon thunderstorms are routine and hurricane season brings serious threats to Miami, Broward, and Palm Beach counties, getting professional roof tarping quickly is critical.
This guide covers everything you need to know about emergency roof protection, including when to use tarping versus shrink wrapping, what to expect from professional installation, how to work with insurance, and how to stay safe while waiting for permanent repairs across the South Florida region.
Table of Contents
- Why Emergency Roof Protection Matters
- What To Do Immediately After Roof Damage
- When You Need Emergency Roof Protection
- Roof Tarping vs Shrink Wrapping
- The Professional Tarping Process
- The Shrink Wrapping Process
- How Long Does Emergency Roof Protection Take?
- How Long Does Protection Last?
- Why DIY Roof Tarping is Dangerous
- Insurance and Documentation
- What to Do While Waiting for Permanent Repairs
- Choosing a Roof Protection Contractor
- Preparing for Storm Season
- Frequently Asked Questions
- Conclusion
What To Do Immediately After Roof Damage
Discovering that your roof has been compromised by a storm, falling tree, or severe leak requires swift action. Understanding the correct steps after roof damage can prevent thousands of dollars in secondary water damage and protect the structural integrity of your home.
If you are wondering about the first steps after roof damage, follow this guide:
1. Ensure Your Family's Safety
If a tree has fallen on your house or part of the roof has collapsed, evacuate the affected area immediately. Structural damage can worsen without warning. Do not re-enter the area until professionals have deemed it safe.
2. Protect the Interior
If water is actively leaking into your home, place buckets, trash cans, or heavy-duty plastic bins under the drips. Move furniture, electronics, and valuables away from the leak. If you cannot move heavy items, cover them with waterproof plastic sheeting.
3. Document the Damage from the Ground
Take clear photos and videos of the damage, both inside your home (water stains, puddles) and outside (missing shingles, exposed decking). Do not climb onto the roof yourself. Damaged roofs are incredibly slippery and unstable, presenting a severe fall hazard.
4. Contact Your Insurance Company
Notify your homeowner's insurance provider immediately to report the damage. Inform them that your roof is exposed to the elements and that you need to arrange for emergency mitigation.
5. Call a Professional for Emergency Roof Protection
Contact a certified restoration or roofing company to install an emergency roof tarp or shrink wrap. Insurance policies require homeowners to mitigate further damage, and a professional installation ensures the roof is sealed correctly without causing further harm to the structure.
By acting quickly and relying on professionals to secure the roof, you can stop water intrusion and buy yourself the necessary time to arrange for permanent repairs.
When You Need Emergency Roof Protection
Several situations call for immediate roof protection:
Storm and Hurricane Damage
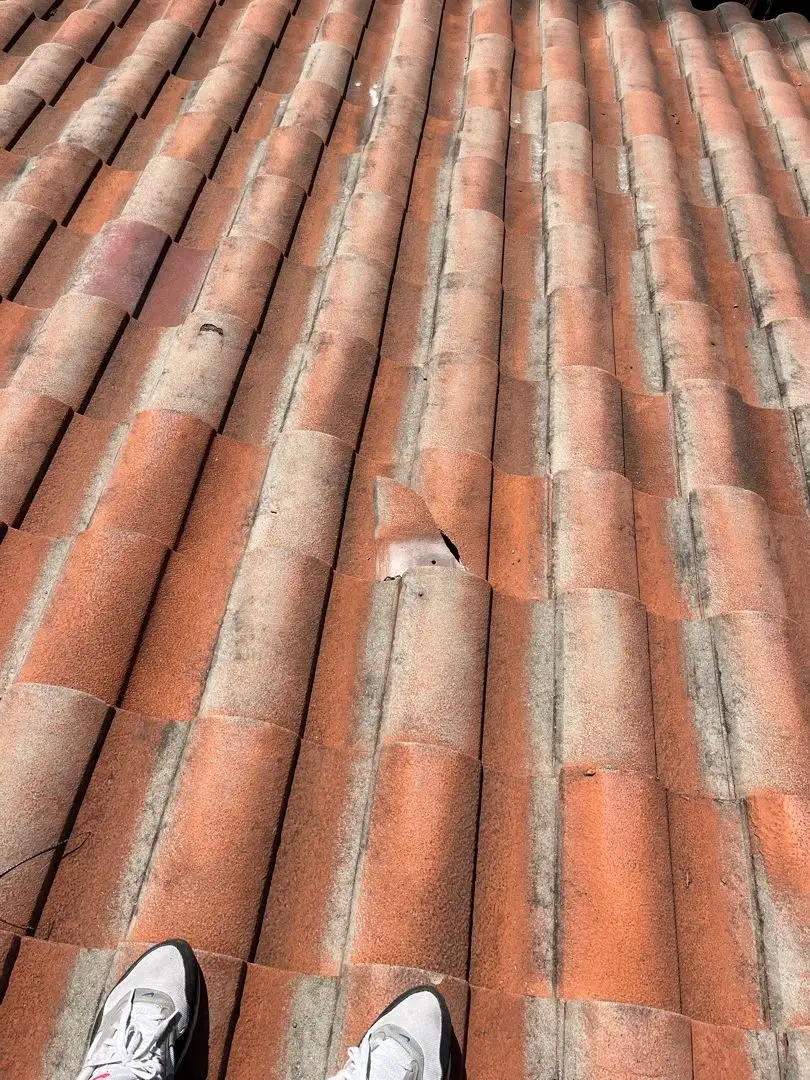
Florida's hurricane season runs from June 1 through November 30, but tropical weather can strike any time. Hurricane roof damage from high winds can lift shingles, tiles, and panels. Flying debris punches holes. Falling trees crush sections of roofing. After any significant storm, inspect your roof (from the ground) for visible damage.
Roof Leaks
Even without a major storm, roofs can fail. Age-related deterioration, poor installation, or gradual wear can cause leaks. If you notice water stains on ceilings, dripping during rain, or water in your attic, you need to address the source quickly.
Fire Damage
Fires often damage roof structures, leaving openings that expose your home to weather. Even if the fire was contained to one area, compromised roofing needs immediate protection while you plan reconstruction.
Fallen Trees and Debris
Trees falling on roofs cause immediate structural damage and create openings. Even after tree removal, the roof needs protection until proper repairs can be made.
Animal Damage
Raccoons, squirrels, and other animals can damage roofing materials, creating entry points for water. While less dramatic than storm damage, these openings still require protection.
Roof Tarping vs Shrink Wrapping
Two primary methods exist for temporary roof protection, each with distinct advantages:
Roof Tarping
Roof tarping involves covering damaged areas with heavy-duty polyethylene tarps secured to the roof structure. It's the most common emergency roof protection method.
Advantages of Tarping:
- Lower upfront cost: Keeps more money in your pocket immediately after a disaster strikes.
- Faster installation: Gets a waterproof barrier over your home in just a few hours, stopping ongoing water damage the same day you call.
- Effective short-term relief (30-90 days): Gives you a safe, dry home while you negotiate with insurance and wait for a roofer.
- Well-understood by insurance adjusters: Rarely questioned during the claims process, making reimbursement smoother.
- Can be installed in most weather conditions: Technicians can get it secured even if it’s currently drizzling or windy.
Best Uses for Tarping:
- Short-term protection while arranging repairs
- Straightforward roof damage with accessible areas
- Budget-conscious situations
- When repairs will happen within a few months
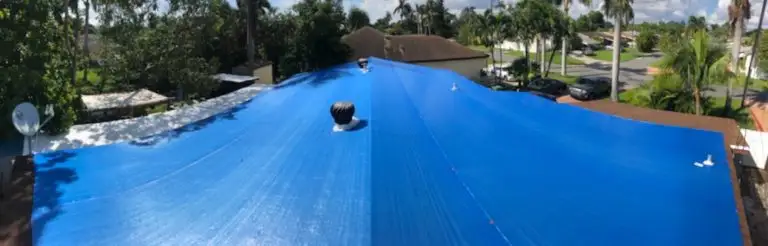
Shrink Wrapping
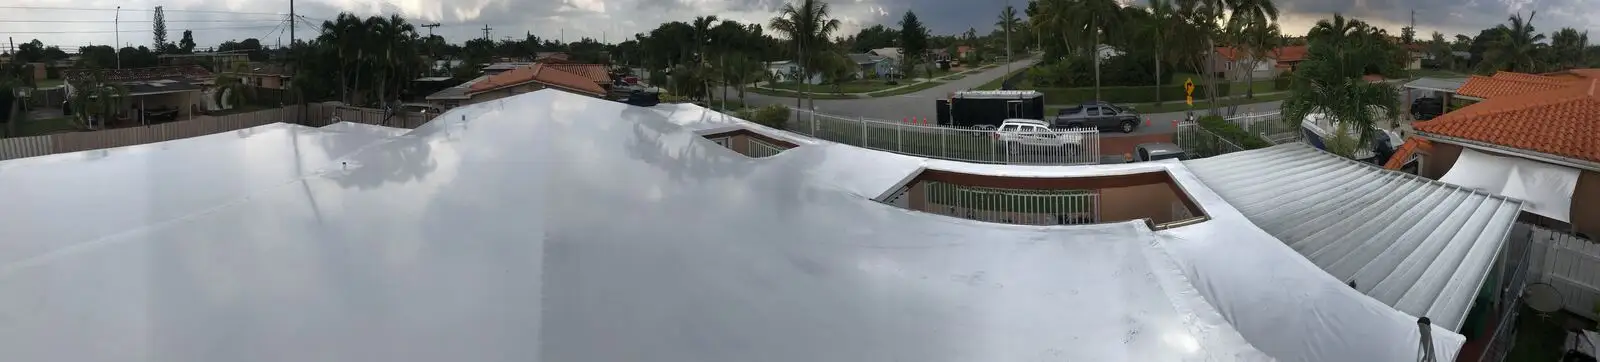
When technicians install a shrink wrap roof, they drape an industrial-grade polyethylene film over the damage and use specialized heat tools to shrink the material. As the heat is applied, the plastic tightens, molding itself perfectly to the shape of your roof. The material conforms tightly to roof surfaces and seams are heat-welded together to create a continuous waterproof membrane.
Advantages of Shrink Wrapping:
- Longer protection (6-12 months or more): Gives you peace of mind if contractor shortages or material delays push your roof replacement back.
- Superior wind resistance: The material won’t flap, tear, or keep you awake at night when the next tropical storm rolls through.
- Conforms to complex roof geometries: Hugs every dormer, skylight, and chimney tightly, leaving no loose edges.
- Better protection for high-wind coastal areas: Stands up to coastal gusts that would quickly shred a traditional tarp.
- No gaps or loose edges for water infiltration: Creates a continuous, seamless barrier that locks water out entirely.
Best Uses for Shrink Wrapping:
- Extended protection when repairs will take months
- Complex roof shapes with dormers, skylights, or multiple angles
- High-wind areas where tarps may fail
- Insurance disputes causing repair delays
- Properties in hurricane-prone locations during storm season
Cost Comparison
Shrink wrapping costs more upfront—typically 2-3 times the cost of tarping. However, if repairs will be delayed, shrink wrap often costs less than replacing tarps multiple times. A single shrink wrap installation lasting 6-12 months may be more economical than 2-3 tarp installations.
Consider your timeline: If permanent repairs will happen within 90 days, tarping is usually the better value. If delays are expected, shrink wrapping may be the smarter investment.
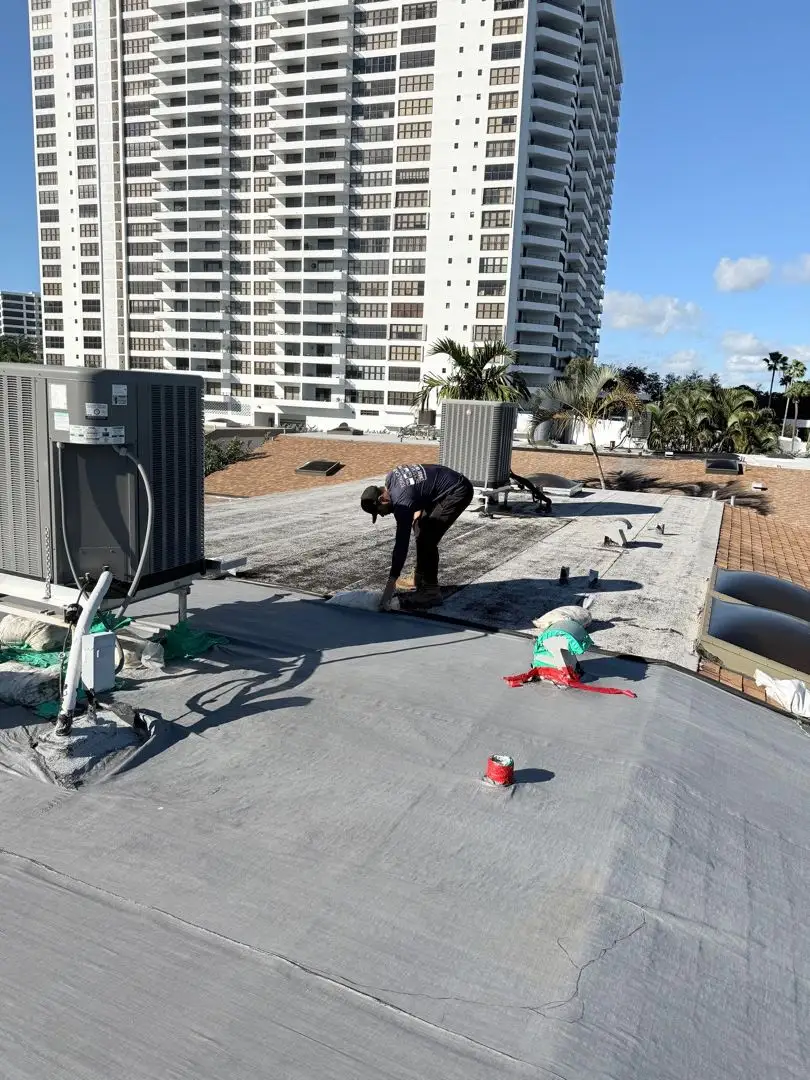
The Professional Tarping Process
Professional roof tarping involves more than throwing a tarp over damage. Here's what to expect:
Assessment
Technicians evaluate the damage extent, roof type, and tarp requirements. They identify anchor points and determine the appropriate tarp size—coverage should extend well beyond the damaged area on all sides.
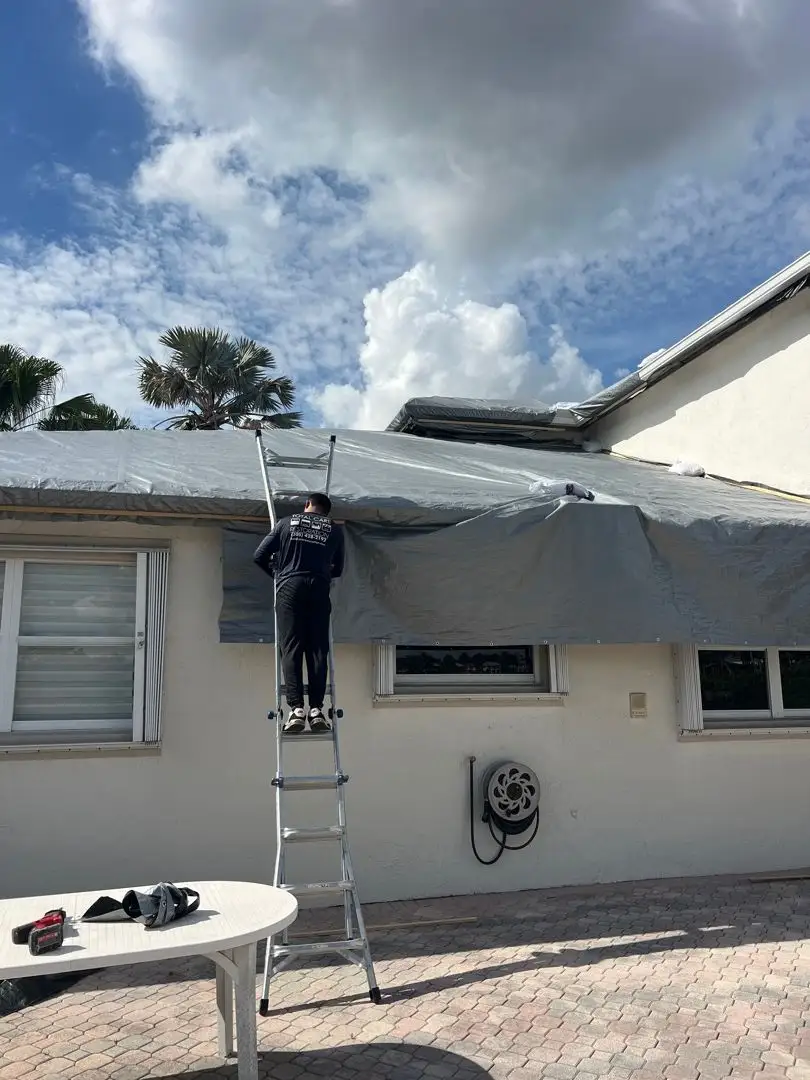
Safety Setup
Roof work is dangerous, especially on damaged structures. Professional crews use proper fall protection, ladders, and safety equipment. They assess structural integrity before walking on damaged areas.
Tarp Selection
Professional-grade tarps are heavier and more durable than hardware store tarps. They're UV-resistant to prevent rapid degradation in Florida's intense sun. Technicians select appropriate weight and size for your specific situation.
Installation Methods
Several anchoring methods exist, depending on roof type:
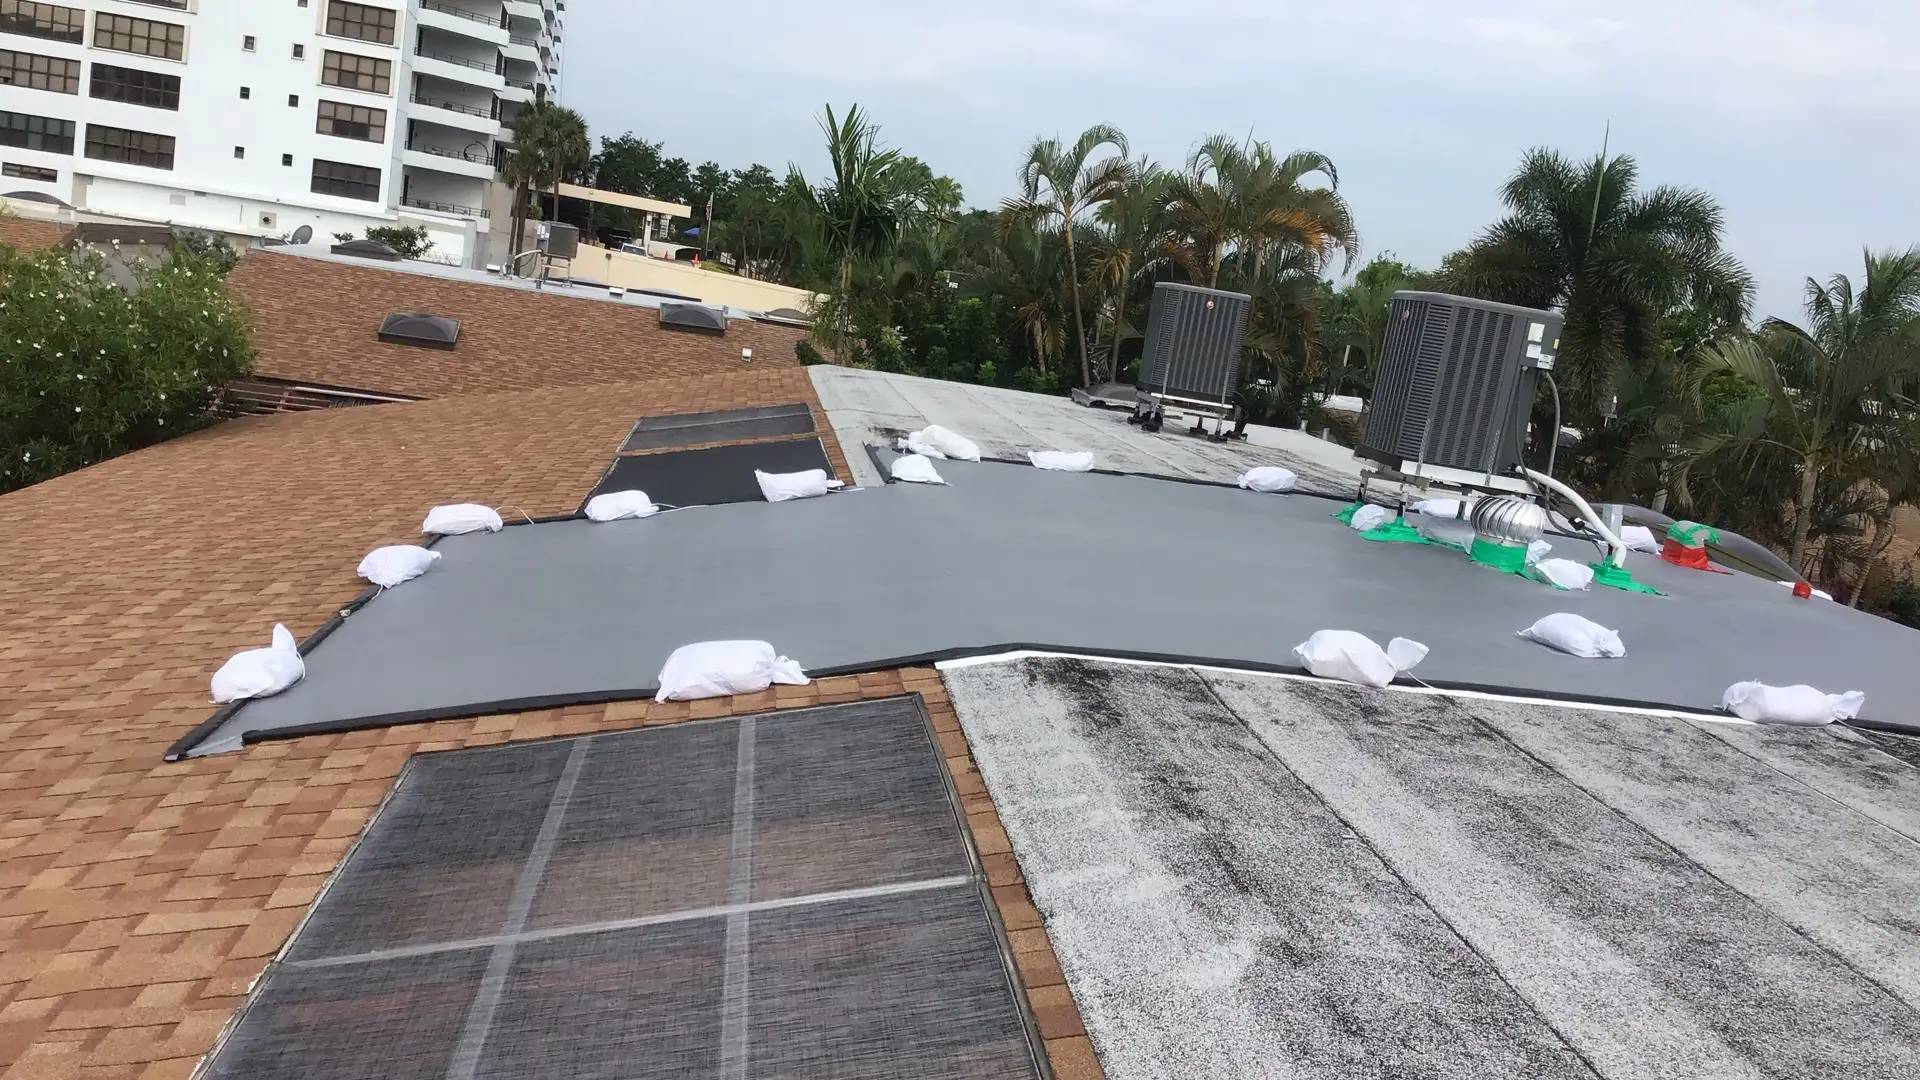
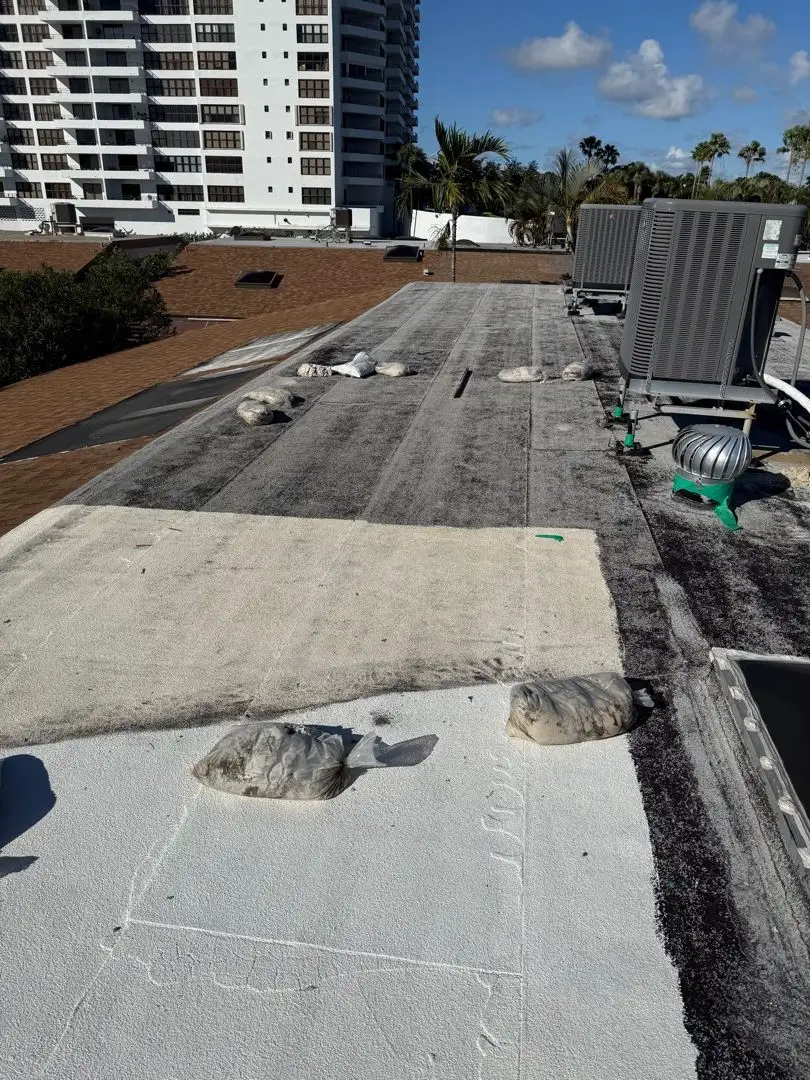
Weighted Systems: Tarps secured with sandbags or weighted water tubes along edges. Works well for flat roofs and doesn't penetrate roofing materials.
Furring Strip Method: Wooden strips (furring strips) wrapped with tarp edges and anchored to undamaged roof areas. Provides secure attachment without nailing into shingles.
Roof Clips: Specialized clips attach to undamaged roofing without penetration. Tarp edges are secured to clips.
Nail-Down: In some cases, nailing through tarp edges into roof decking is necessary. This is typically a last resort as it creates additional penetrations.
Sealing and Overlapping
Multiple tarps may be needed for large areas. Professional installation overlaps seams properly and seals edges to prevent water infiltration. The high side of overlaps always faces uphill to shed water correctly.
Documentation
Reputable companies photograph the damage before installation and document the completed tarp for insurance purposes. This documentation supports your claim and provides a record of the protective measures taken.
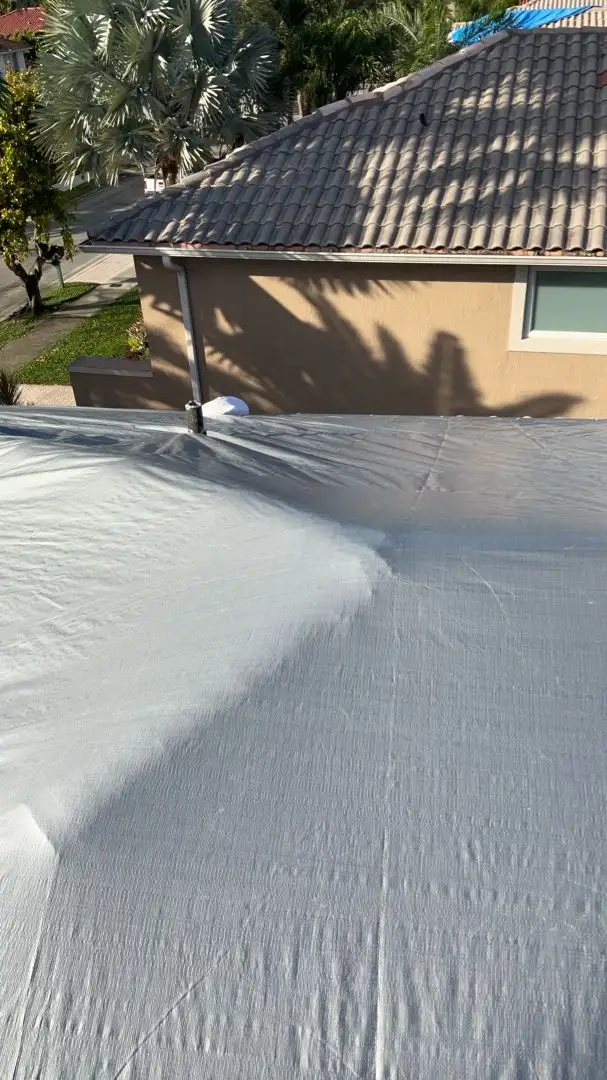
The Shrink Wrapping Process
Shrink wrap installation is more involved than tarping but creates superior protection:
Surface Preparation
The roof surface is cleaned of loose debris. For damaged areas, any sharp edges that could puncture the shrink wrap are addressed.
Framework Installation
Depending on roof geometry, a framework of wooden supports may be installed to create proper drainage angles and prevent water pooling on the shrink wrap surface.
Shrink Wrap Application
Technicians unroll industrial-grade shrink wrap directly over the damaged sections of the roof. They carefully drape the thick material over dormers, valleys, and roof edges, leaving plenty of overlap so the final seal has no weak points.
Heat Sealing
Using specialized propane heat tools, technicians slowly pass the heat across the surface of the plastic. As the material warms, it immediately begins shrinking and pulling tight across the roof deck like a drum. The technicians then heat-weld the seams together, melting the overlapping layers into a single, continuous, wind-proof barrier.
Edge Securing
Edges are secured to prevent wind uplift, typically using weighted systems or mechanical fasteners. The tight seal created by shrink wrapping resists wind far better than tarps.
Quality Inspection
Completed installations are inspected for complete coverage, sealed seams, and secure edges. Any gaps or weak points are addressed before the job is complete.
How Long Does Emergency Roof Protection Take?
When water is actively entering a home, property owners urgently want to know, "How long does roof tarping take?" The installation timeline depends on the size of the roof, the complexity of the damage, and the weather conditions at the time of service.
While every situation is unique, here is a general idea of the installation time you can expect:
- Emergency Roof Tarping (2 to 4 hours): For a standard residential roof with localized damage (such as a missing patch of shingles or a small hole from a branch), a professional crew can typically assess the damage, set up safety equipment, and securely install a tarp in a few hours.
- Complex Tarping or Large Roofs (Half a day to a full day): If the damage is extensive, the roof has a steep pitch, or multiple tarps need to be integrated to cover large sections, the process will take longer. Crews must take extra care to ensure all overlaps are watertight and securely anchored against the wind.
- Shrink Wrap Installation (1 to 2 days): Shrink wrapping is a much more involved process than tarping. Because it requires building a structural framework, draping heavy-duty polyethylene film, and meticulously heat-sealing all seams to create a continuous membrane, installing shrink wrap typically takes a full day or more depending on the size of the property.
Factors that can delay your emergency roof protection timeline include dangerous weather conditions (crews cannot safely work on a roof during high winds or active lightning) and extremely high demand following a major hurricane. However, once the crew is on-site and conditions are safe, the actual installation is remarkably swift.
How Long Does Protection Last?
Protection duration depends on the method and conditions:
Tarp Lifespan
- Quality installation: 30-90 days typically
- UV exposure: Florida's sun degrades tarps faster than northern climates
- Wind events: High winds can loosen or tear tarps
- Tarp quality: Professional-grade tarps last longer than consumer products
Tarps should be inspected after any significant weather event. Plan for tarp replacement if repairs extend beyond the initial protection period.
Shrink Wrap Lifespan
- Standard installations: 6-12 months
- Premium materials: Up to 18 months in some cases
- UV stabilization: Quality shrink wrap is formulated for extended outdoor exposure
- Wind resistance: Properly installed shrink wrap rarely fails from wind alone
Shrink wrap provides more predictable protection duration, making it easier to plan for permanent repairs.
Why DIY Roof Tarping is Dangerous
We strongly advise against attempting roof tarping yourself. Here's why:
Fall Hazards
Falls from ladders and roofs are a leading cause of serious injury and death in home accidents. Damaged roofs are especially dangerous because structural integrity may be compromised. You could step on an area that appears solid but collapses.
Improper Installation Failures
Improperly installed tarps can:
- Blow off in the next storm, leaving your roof exposed
- Flap and cause additional damage to roofing materials
- Create water channels that concentrate flow into your home
- Provide false confidence while water continues entering
Insurance Complications
If you're injured during DIY tarping, your health insurance claim could be complicated. If your tarp fails and causes additional damage, your homeowner's claim could be affected. Improper tarping may also void certain policy provisions.
Voiding Warranties
Some roofing warranties require professional repairs. DIY tarping that causes additional damage could void your warranty on the entire roof system.
Wasted Time and Money
If DIY tarping fails, you'll still need professional help—plus you've spent time, money, and potentially risked injury on an ineffective solution.
Insurance and Documentation

Working with insurance is a key part of the emergency roof protection process:
Immediate Steps After Damage
- Document everything: Photograph damage from multiple angles before any work is done
- Contact your insurer: Report the damage promptly—most policies require timely notification
- Review your policy: Understand your deductible, coverage limits, and any hurricane deductible provisions
- Keep receipts: Save all receipts for emergency services and temporary repairs
What Insurance Typically Covers
Emergency tarping and shrink wrapping is usually covered as part of damage mitigation—it prevents additional damage and reduces overall claim costs. This coverage typically applies when:
- Damage resulted from a covered peril (wind, falling objects, etc.)
- The temporary protection was reasonably necessary
- Professional installation was used
Hurricane Deductibles
Florida policies often include hurricane deductibles—typically 2-5% of your home's insured value rather than a flat dollar amount. On a $400,000 home with a 2% hurricane deductible, you'd pay $8,000 before coverage begins. Understand your deductible before storm season.
Documentation for Claims
Professional restoration companies provide documentation including:
- Photos of damage before and after tarping
- Detailed scope of work
- Itemized invoices
- Moisture readings and assessments
- Written reports suitable for insurance submission
Working with Adjusters
When the insurance adjuster inspects your property:
- Be present if possible
- Point out all damage, including less obvious areas
- Provide your documentation
- Ask questions and take notes
- Get everything in writing
What to Do While Waiting for Permanent Repairs
Temporary roof protection buys you time, but you still need to take action:
Monitor the Protection
Check your tarp or shrink wrap regularly, especially after storms. Look for:
- Tears or punctures
- Loose edges or flapping sections
- Pooling water
- Signs that water is getting through
Report any issues immediately for repair.
Address Interior Damage
While your roof is protected, address any damage inside:
- Dry wet areas to prevent mold growth
- Document all interior damage for insurance
- Remove saturated materials that can't be saved
- Run dehumidifiers to reduce humidity
Arrange Permanent Repairs
Don't wait until protection expires to schedule repairs:
- Get multiple estimates from licensed roofing contractors
- Verify licenses through Florida DBPR
- Check references and reviews
- Understand the timeline—after major storms, roofers may be booked for months
- Communicate with your insurance company about repair plans
Plan for Extended Protection
If repair timelines extend beyond your tarp's lifespan:
- Schedule tarp replacement before it fails
- Consider upgrading to shrink wrap for longer protection
- Factor additional protection costs into your planning
Choosing a Roof Protection Contractor
After storms, unfortunately, scammers and storm chasers target affected areas. Protect yourself:
Verify Credentials
- Check Florida contractor licenses through DBPR (Department of Business and Professional Regulation)
- Verify insurance coverage—ask for certificates
- Look for established local businesses with permanent addresses
- Check Google reviews and Better Business Bureau ratings
Warning Signs of Scams
- Door-to-door solicitation immediately after storms
- Pressure to sign contracts immediately
- Requests for large upfront payments
- Out-of-state license plates and no local presence
- Offers to waive your insurance deductible (this is insurance fraud)
- No written contracts or vague scope descriptions
Questions to Ask
- How long have you been in business locally?
- Can you provide local references?
- What's your payment structure?
- How do you document work for insurance?
- What warranty do you provide on installations?
- Are you available for emergency response during storm season?
Why Local Matters
Local companies:
- Have reputations to protect in the community
- Are familiar with Florida building codes
- Will be available for follow-up and warranty work
- Have relationships with local suppliers
- Understand regional insurance practices
Preparing for Storm Season
Prevention and preparation reduce emergency situations:
Before Hurricane Season (June 1)
- Have your roof professionally inspected
- Address any existing damage or wear
- Clear trees and branches near your roof
- Know your insurance coverage and deductibles
- Have a restoration company's contact information saved
- Keep tarps and basic supplies on hand (though don't plan to install yourself)
- Document your property condition with photos and video
During Active Storms
- Monitor forecasts and take warnings seriously
- Follow evacuation orders if issued
- Secure outdoor items that could become projectiles
- Know your emergency contacts
After Any Storm
- Inspect your roof from the ground for visible damage
- Enter your home carefully, watching for hazards
- Document any damage immediately
- Contact professionals promptly—don't wait to see if problems develop
Frequently Asked Questions
How quickly can you respond to a roof emergency? Professional restoration companies typically respond within 1-2 hours for emergencies. After major hurricanes, response times may extend due to high demand. Companies that pre-position resources before storms can respond faster when communities need help most.
Can you tarp any type of roof? Professional crews can tarp all roof types including shingle, tile, metal, and flat roofs. Each type requires different techniques and anchor methods. Tile roofs require particular care to avoid breaking tiles.
Will a tarp damage my roof? Properly installed professional tarps protect rather than damage roofs. Professionals use appropriate anchoring methods that don't require nailing into shingles or tiles. Improper DIY installation, however, can cause additional damage.
What if another storm hits while my roof is tarped? Quality professional installations are designed to withstand subsequent weather events. However, severe storms can damage even well-installed tarps. Have your protection inspected after any significant weather and contact your service provider immediately if damage occurs.
Can I get tarping done the same day I call? For emergencies, same-day service is typically available. Most residential tarping is completed within 2-4 hours of arrival. Larger or more complex roofs take longer. After major storms, scheduling may require more lead time due to high demand.
Is shrink wrapping worth the extra cost? For protection lasting more than 90 days, shrink wrapping often provides better value than multiple tarp replacements. For shorter timelines, tarping is usually more economical. Your service provider can help you evaluate options based on your specific situation and repair timeline.
Conclusion
Emergency roof protection is critical for preventing small problems from becoming disasters. In Florida, where storms are common and repair timelines can stretch for months after major hurricanes, understanding your options helps you make informed decisions.
Whether you need tarping for short-term protection or shrink wrapping for extended coverage, professional installation ensures your property is protected while you arrange permanent repairs. Don't risk your safety with DIY attempts, and don't delay—every hour an damaged roof remains exposed increases your restoration costs.
If your roof is damaged, contact a professional restoration company immediately. Quick response, proper installation, and thorough documentation protect both your property and your insurance claim. We're available 24/7 for emergency roof protection and can help you determine the best approach for your situation.
About the Author
Alejandro Diaz is an IICRC-Certified restoration expert and licensed plumber with extensive experience navigating the unique property damage challenges of South Florida. As a leading specialist in disaster recovery, Alejandro combines his deep technical knowledge with a commitment to providing the Miami and South Florida community with the highest standard of emergency restoration services.
Watch: Professional Roof Tarping & Storm Protection
Need Professional Assistance?
Our certified technicians are available 24/7 to help with your restoration needs. Get a free assessment and expert guidance for your specific situation.