How to Assess Storm Damage to Your Home: Complete Guide
Assessing Your Home After a Storm
After a hurricane or major storm passes through South Florida, the urge to immediately inspect your property is strong. However, a systematic approach to damage assessment keeps you safe and ensures you document everything needed for insurance claims.
This guide walks you through the process from the moment it's safe to go outside until you've completed documentation for your insurance company.
Before You Begin: Safety First
Wait for All-Clear
Never begin inspection until:
- Officials declare it safe to be outside
- The storm has completely passed (not just the eye)
- Daylight allows proper visibility
- Conditions allow safe movement
Personal Safety Equipment
Before going outside, prepare:
- Sturdy closed-toe shoes or boots
- Long pants and long sleeves
- Work gloves
- Flashlight (even during day, for interiors)
- Phone for photos and emergency calls
- First aid kit accessible
Hazards to Watch For
During your assessment, constantly watch for:
Electrical Hazards
- Downed power lines
- Flooded areas near any wiring
- Damaged electrical panels
- Sparking or buzzing sounds
Structural Hazards
- Sagging roofs or ceilings
- Cracked or leaning walls
- Broken glass
- Weakened stairs or decks
Other Dangers
- Sharp debris
- Exposed nails
- Displaced wildlife (snakes, etc.)
- Contaminated standing water
- Gas leaks
Exterior Assessment: Step by Step
Step 1: Approach Carefully
Walk around your property perimeter first:
- Stay back from the structure initially
- Look for obvious structural damage
- Note any downed trees or large debris
- Check for gas odors
- Identify any immediate hazards
Step 2: Roof Assessment (From Ground)
Look up at your roof from multiple angles:
What to Look For
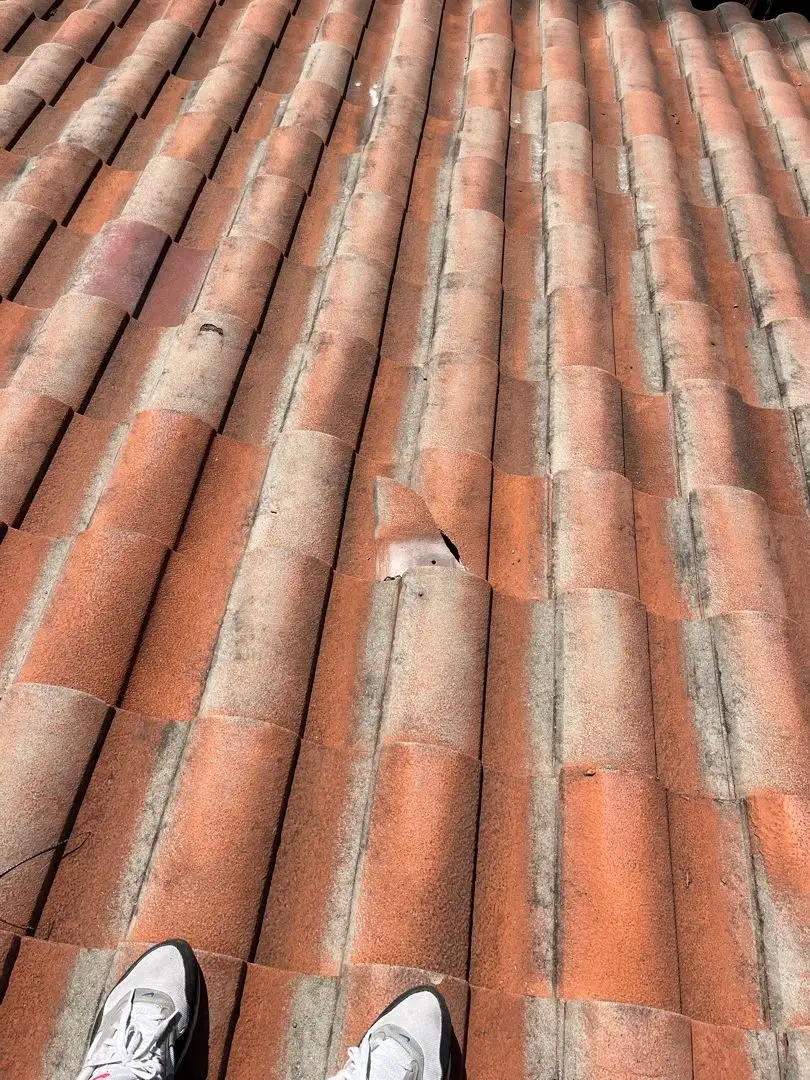
- Missing shingles or tiles
- Lifted or curled roofing
- Visible holes or penetrations
- Damaged or missing flashing
- Debris on the roof
- Damage to ridge caps and vents
- Satellite dishes, antennas displaced
Important: Don't climb on your roof. Use binoculars if available. A professional should inspect up close.
Step 3: Check Soffit and Fascia
These often show damage:
- Missing or dangling soffit panels
- Damaged fascia boards
- Water staining indicating intrusion
- Disconnected gutters
Step 4: Windows and Doors
Inspect each opening:
- Broken or cracked glass
- Damaged frames
- Compromised seals
- Signs of water intrusion
- Damaged shutters (if applicable)
Step 5: Siding and Exterior Walls
Check all exterior surfaces:
- Missing or loose siding
- Impact marks or punctures
- Cracks in stucco or masonry
- Paint damage or bubbling
- Signs of water behind siding
Step 6: Garage and Outbuildings
Don't forget:
- Garage door damage
- Shed or outbuilding condition
- Pool cage or screen enclosure
- Fence damage
- Outdoor kitchen or structures
Step 7: Grounds and Trees
Assess your property:
- Fallen trees and branches
- Leaning trees that could fall
- Root damage to foundations
- Debris accumulation
- Damage to driveways and walkways
Interior Assessment
Before Entering
Only enter if:
- Structure appears sound
- No strong gas odors
- No sagging ceilings or walls
- Floor appears stable
- No electrical hazards visible
Systematic Interior Check
Ceilings
- Water stains (new or expanding)
- Sagging or bulging areas
- Cracks
- Fallen debris
- Active dripping
Walls
- Water staining
- Cracks or displacement
- Bubbling paint
- Moisture on surface
- Mold growth (may appear quickly)
Floors
- Standing water
- Warping or buckling
- Water marks on carpet
- Lifted tiles
- Moisture under flooring
Windows and Doors (Interior Side)
- Water pooled on sills
- Moisture between panes
- Damaged frames
- Signs of water entry
Attic (If Safe to Access)
- Daylight visible through roof
- Water staining on rafters
- Wet insulation
- Active leaks
- Displaced or damaged materials
Documentation for Insurance
Photography Guidelines
Take extensive photos:
Overall Shots
- Wide shots showing context
- Multiple angles of each damage area
- Distance shots showing extent
Detail Shots
- Close-ups of specific damage
- Damage with measuring reference (ruler/tape)
- Serial numbers of damaged appliances
Before/After Reference
- Photos showing pre-storm condition if available
- Social media posts with your home visible
- Real estate listing photos
Written Documentation
Create a detailed list:
- Date and time of discovery
- Location of each damage area
- Description of damage
- Estimated extent
- Related damages (water from roof led to ceiling damage)
Video Walkthrough
In addition to photos:
- Record continuous video of interior
- Narrate what you're seeing
- Show relationship between damage areas
- Include date/time stamp
Preserve Evidence
Important steps:
- Don't throw away damaged items yet
- Keep damaged materials if possible
- Save any debris that caused damage
- Retain damaged appliances for adjuster
When to Call Professionals
Emergency Situations - Call Immediately
Contact emergency services for:
- Gas leaks
- Structural instability
- Electrical hazards
- Injuries
Restoration Professionals - Call Same Day
Contact restoration company for:
- Any water intrusion
- Roof damage allowing water entry
- Flooding of any extent
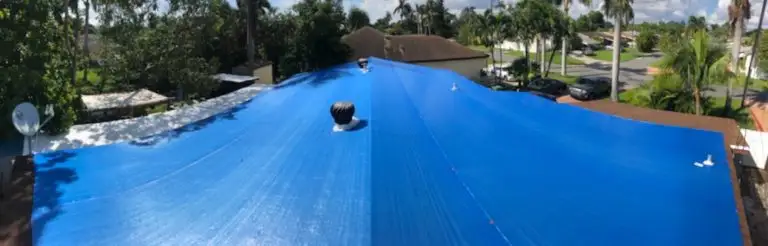
- Need for emergency tarping
Your Insurance Company - Call Same Day
Report to insurance:
- Any damage requiring claim
- Need for emergency services
- Before authorizing significant repairs
Working with Your Insurance Company
Initial Claim
When reporting:
- Have policy number ready
- Provide date of loss
- Describe damage broadly
- Request claim number
- Ask about next steps
Adjuster Visit
Prepare for the adjuster:
- Have documentation ready
- Walk through damage with them
- Point out all damage areas
- Don't sign anything without reading
- Get their contact information
Emergency Repairs
You can make emergency repairs to prevent further damage:
- Tarping roof leaks
- Boarding broken windows
- Removing dangerous debris
- Water extraction for flooding
Important: Keep all receipts and document before and after.
Common Post-Storm Damage Patterns
What to Expect in South Florida
Wind Damage Patterns
- Roof damage often on wind-facing sides
- Screen enclosures commonly fail
- Garage doors vulnerable
- Older shingle roofs lose coverage
Water Intrusion Patterns
- Roof damage leads to attic/ceiling damage
- Window/door failures cause wall damage
- Flooding follows lowest points
- Water travels along structural members
Hidden Damage
- Water in wall cavities
- Damage under shingles
- Compromised roof decking
- Mold beginning behind walls
Creating Your Damage Report
Compile everything into organized report:
Summary Section
- Date of storm
- Date of assessment
- Overall damage description
- Immediate concerns
Detailed Damage List
Organize by location:
- Exterior - Roof
- Exterior - Walls
- Exterior - Windows/Doors
- Exterior - Other
- Interior - Each affected room
- Systems - Electrical, Plumbing, HVAC
Supporting Documentation
- All photos organized by area
- Video files
- Written descriptions
- Pre-storm comparison photos
- Receipts for emergency repairs
Conclusion
A thorough, systematic storm damage assessment protects both your safety and your insurance claim. Take your time, document everything, and don't hesitate to call professionals for help.
At Total Care Restoration, we provide comprehensive damage assessments as part of our storm restoration services. Our experts can identify damage you might miss and document it properly for your insurance claim.
If your South Florida home has sustained storm damage, call us at (786) 610-6317 for emergency assistance. We're available 24/7 to help protect your property from further damage.
Want to Learn More?
Read our comprehensive guide covering everything you need to know about this topic.
The Complete Guide to Storm Damage Restoration and Roof Protection in FloridaNeed Professional Help?
Our expert team is ready to assist with your storm damage restoration needs.
View Storm Damage Restoration Services